Tag Archives: bearing

China Good quality Wholesale Axle Bearing Automobile Parts Dac356535 near me factory

Product Description

Welcome to choose KORTON INDUSTRIAL LIMITED. 

NO 1. our adwantages:

1. 14 years bearing products manufacturing and exporting experiences.
2. OEM order and non-standard bearing order can be accepted.
3. Many sizes of bearing are available. Large quantity bearing can be provided.
4. To respect customers, you can choose the loading port.
5. A certain number of free sample can be provide to support our customer’s after-sale services and warranty.
 
NO 2. Description: Auto wheel bearing:

The main functions of wheel hub bearings are load and provide accurate guidance to the turn of hub bearings. Hub bearings not only carry axial load but also carry radial load, they are important components. They can carry heavy radial load which include axial and radial load and torques load, they can limit axial displacement both sides. They are mainly used in components which limitation of bearings and shell axial displacement of both sides. Hub bearings’ design are familiar to the 2 back to back order single row conntact ball bearings, but the width are shorter than single row bearings. Compare to the single row bearings hub bearings have better rigidity.
 
 NO 3. OEM all brand bearing
 
 NO 4. Auto Wheel Bearing Specification: 


Seals Types ZZ,2RS,OPEN
Vibration Level Z1V1,Z2V2,Z3V3
Clearance C2,C0,C3,C4,C5
Tolerance Codes ABEC-1,ABEC-3,ABEC-5
Materral GCr15-China/AISI521W
DAC30600037 30 60 37 37 0.42 529891AB BA2B633313C   DAC3060W
DAC30620038 30 62 38 38 0.52 545312 418780 30BWD10  
DAC30630042 30 63 42 42 0.57 581736 45716A 30BWD01A  
DAC30640042 30 64 42 42 0.5     34BWD03ACA78 DAC3064W2R
DAC32720045 32 72 45 45 0.81 531910   32BWD05CA75  
DAC34620037 34 62 37 37 0.41 561447 BAHB311316B 34BWD08/CA70  
DAC34640037 34 64 37 37 0.43 540466B 3 0571 6DA 34BWD11 DAC3464G1
DAC34660037 34 66 37 37 0.5 580400CA 636114A 34BWD10B  
DAC34670037 34 67 37 37 0.52 532066DB      
DAC34680037 34 68 37 37 0.55 567918B     DAC3468DW
DAC35620040 35 62 40 40 0.43 430042C      
DAC35640037 35 64 37 37 0.41   BT2B445620B    
DAC35650035 35 65 35 35 0.4 546238A 443952   DAC3565WCS30
DAC35660033 35 66 33 33 0.43   BAHB633676    
DAC35660037 35 66 37 37 0.48 544307 BAHB311309   DAC35660037
DAC35680033/30 35 68 33 30 0.47 546238 BA2B445535AE 35BWD07A DAC3568W-6
DAC35680037 35 68 37 37 0.52 541153 633295   DAC3568A2RS
DAC35720033 35 72 33 33 0.58 548083 BA2B446762B    
DAC35725713/31 35 72 33 31 0.56 562686 FWB14 35BWD06ACA111 DAC357233B-1W
DAC3572571 35 72 33 33 0.58 548083 BAHB633669 35BWD08A DAC357545CW2R
DAC35720034 35 72 34 34 0.58 54 0571 BAHB633967 35BWD01 DAC357234A
DAC3572571 35 72 34 34 0.58   BAHB633528F    
DAC36640042 36 64 42 42 0.46     CRI-0787  
DAC36680033 36 68 33 33 0.47       DAC3668AWCS36
DAC37720033 37 72 33 33 0.5   BAH-0051B    

NO 6. Some Auto wheel bearing OEM number and Application:

OEM NUMBERS DESCRIPTION APPLICATION
B001-33-043 WHEEL BEARINGS SPORTAGE
04495-0K120 WHEEL BEARINGS HILUX’07
42409-19015 WHEEL BEARING REAR COROLLA
42409-33571 WHEEL BEARING REAR CAMRY 1
90369-38011 WHEEL BEARING FRONT COROLLA 3872
43504-12090 WHEEL HUB FRONT COROLLA
42409-2571 WHEEL BEARING REAR AVENSIS, CARINA
43502-20131 WHEEL HUB FRONT CARINA
44300-S3V-AO1 WHEEL BEARINGS FRONT TRUCK / LAND CRUISE
42409-42571 WHEEL BEARINGS REAR RAV 4
518506 WHEEL HUB FRONT CAMRY
175407615 WHEEL HUB FRONT GOLF 1
331598625 WHEEL BEARING REAR GOLF II
3871 WHEEL BEARING FRONT TOY STARLET
4382 WHEEL BEARING CAMRY
90368-50008 WHEEL BEARING DYNA
90369-32003 WHEEL BEARING RX80 FRONT
45710-C6000 WHEEL BEARING NISSAN PATROL FRONT
45710-50Y00-D WHEEL BEARING NISSAN SUNNY
45710-71L00-D WHEEL BEARING NISSAN
42200-SH3-970-D WHEEL BEARING HONDA CIVIC
42300-SD4-004 WHEEL BEARING HONDA BALLADE
43210-C9300-D WHEEL BEARING NISSAN PATROL
43210-D5710-D WHEEL BEARING NISS-B/BIRD REAR
44200-SM4-0131 WHEEL BEARING HONDA-CIVIC
44300-SB2-965 WHEEL BEARING HONDA
44300-S04-0040 WHEEL BEARING HONDA-CIVIC
MB584761 WHEEL BEARING MITS-LANCER
MB664447 WHEEL BEARING MITS-PAJERO
46T080604 WHEEL BEARING COROLLA-REAR
DG4 0571 6WRS/DG4094W WHEEL BEARING REAR HIACE 4X4
3874 WHEEL BEARINGS CORONA
157148/10 WHEEL BEARINGS L/CRUISER
104948/10 WHEEL BEARINGS L/CRUISER
48548/10 WHEEL BEARINGS HIACE 2Y
12649/10 WHEEL BEARINGS HIACE  2Y
30303D WHEEL BEARINGS L/CRUISER
4T-CR1-0881 WHEEL BEARINGS BLUEBIRD
11162/ WHEEL BEARINGS LAND ROVER
69345/10 WHEEL BEARINGS MAZDA 323
11749/10 WHEEL BEARINGS NISSAN 1400
35715 WHEEL BEARINGS MAZDA B1800
35714 WHEEL BEARINGS L/CRUISER
67048/10 WHEEL BEARINGS CRESSIDA
44649/10 WHEEL BEARINGS NISSAN 1400
45449/10 WHEEL BEARINGS COROLLA DX
30849/10 WHEEL BEARINGS TOYOTA
6308 WHEEL BEARINGS TOY HIACE
U399 WHEEL BEARINGS TOY HILUX
11949/10 WHEEL BEARINGS NISSAN 1400
30304 WHEEL BEARINGS L/CRUISER
4080 WHEEL BEARINGS MITSUBISHI
603049/10 WHEEL BEARINGS TOYOTA
6306CNXL330 GEAR BOX BEARINGS NISSAN TD27
TR080702J GEAR BOX BEARINGS TOYOTA COROLLA
3314598 WHEEL BEARINGS FORD RANGER
DAC38640036 WHEEL BEARINGS TOYOTA COROLLA REAR
TR070904-J-N DIFF BEARINGS L/CRUISER
R30-13 DIFF BEARINGS L/CRUISER
TR100802-I-N DIFF BEARINGS L/CRUISER
42BWD06 WHEEL BEARINGS NISSAN BLUEBIRD
46T 0571 05 WHEEL BEARINGS TOYOTA LUCIDA
HM801310-22-N DIFF BEARINGS MITSUBISHI CANTER
LM603049/10 WHEEL BEARINGS FORD/L/ROVER
17831/17887 DIFF BEARINGS TOYOTA HIACE
2788 WHEEL BEARINGS L/CRUISER
26882 WHEEL BEARINGS L/CRUISER
28985/28920 DIFF BEARINGS MITSUBISHI CANTER
HM801349-N DIFF BEARINGS MITSUBISHI CANTER
50KW8019 DIFF BEARINGS MITSUBISHI CANTER
45289 WHEEL BEARINGS TOYOTA DYNA
43BWD03 WHEEL BEARINGS TOYOTA MARK11
35BWD16 WHEEL BEARINGS NISSAN MARCH
LM300811 WHEEL BEARINGS NISSAN 1TONNER
LM60571 WHEEL BEARINGS NISSAN 1TONNER
35712 WHEEL BEARINGS MITSUBISHI CANTER FRONT
35718j/57307 WHEEL BEARINGS MITSUBISHI L200 REAR
ST2749 WHEEL BEARINGS TOYOTA STARLET FRONT
55KW02 WHEEL BEARINGS MITSUBISHI FUSO FRONT
55KW01 WHEEL BEARINGS MITSUBISHI FUSO FRONT
25KC802 DIFF BEARINGS L/CRUISER
35BW08 WHEEL BEARINGS TOWNACE REAR
32207 WHEEL BEARINGS MITSUBISHI CANTER FRONT
DAC4380A WHEEL BEARINGS MAZDA 626
46T 0571 04A WHEEL BEARINGS TOYOTA CONDOR FRONT
TR0708030 DIFF BEARINGS TOYOTA HIACE
32012X WHEEL BEARINGS MITSUBISHI L200/CANTER REAR
4276 WHEEL BEARINGS MITSUBISHI L200/CANTER REAR
28580 DIFF BEARINGS TOYOTA COASTER
3579R/25 WHEEL BEARINGS TOYOTA DYNA FRONT
HR32210J DIFF BEARINGS MITSUBISHI CANTER
HR32206J WHEEL BEARINGS NISSAN SUNNY
HR35717J DIFF BEARINGS NISSAN
DU5496-5 WHEEL BEARINGS TOYOTA HILUX
40KW019 WHEEL BEARINGS MITSUBISHI FUSO FRONT
TR0607R DIFF BEARINGS TOYOTA HIACE
TR57326 DIFF BEARINGS TOYOTA COASTER
2474 DIFF BEARINGS TOYOTA COASTER
33013A WHEEL BEARINGS TOYOTA COASTER
HR32307CN DIFF BEARINGS TOYOTA HILUX
32310 WHEEL BEARINGS ISUZU LIGHT TRUCK
40BWD12 WHEEL BEARINGS TOYOTA VISTA
33205JR WHEEL BEARINGS TOYOTA VISTA
LM300849 WHEEL BEARINGS NISSAN-DATSUN
50KWH01 WHEEL BEARINGS MITSUBISHI SPORTERO
40KW01 DIFF BEARINGS MITSUBISHI FUSO
30305 WHEEL BEARINGS NISSAN
32571XJ WHEEL BEARINGS NISSAN
35718 WHEEL BEARINGS NISSAN
32304 WHEEL BEARINGS ISUZU
DAC43792RS WHEEL BEARINGS HONDA CRV
40KWD02 WHEEL BEARINGS MITSUBISHI SPORTERO
38BWD06 WHEEL BEARINGS TOYOTA MARK11 FRONT
43KWD04 WHEEL BEARINGS NISSAN PRIMERA
427638 WHEEL BEARINGS TOYOTA REGUS FRONT
LM68149/10 WHEEL BEARINGS CROWN FRONT
LM12749/10 WHEEL BEARINGS CROWN FRONT
32005JR WHEEL BEARINGS MAZDA FRONT
35BCD08 WHEEL BEARINGS TOYOTA NOAH REAR
LM506810 WHEEL BEARINGS L/CRUISER
ET33011 WHEEL BEARINGS NISSAN CABSTER
RNU0727 WHEEL BEARINGS L/CRUISER
46T08805 WHEEL BEARINGS MITSUBISHI PAJERO
1220 WHEEL BEARINGS TOYOTA DYNA
28584 WHEEL BEARINGS TOYOTA COASTER
469-N WHEEL BEARINGS TOYOTA COASTER REAR
28BWD01A WHEEL BEARINGS TOYOTA COROLLA REAR
57305 WHEEL BEARINGS TOYOTA TOWNACE
40BWD06 WHEEL BEARINGS MAZDA FRONT
AU 0571 -2 WHEEL BEARINGS NISSAN X-TRAIL
ME6 0571 4 THRUST BEARING MITS-4D30
30502-28E20 THRUST BEARING TD27
30502-53J00 THRUST BEARING GA16
31230-12140 THRUST BEARING EE90
31230-35070 THRUST BEARING TOY-3L
31250-35050 THRUST BEARING TOY-2L
31230-35090 THRUST BEARING TOY-5L
31230-36160 THRUST BEARING TOY-1HZ
31230-60130 THRUST BEARING TOY-1FZ
MD703270 THRUST BEARING MITS-4D55
ME657110-D THRUST BEARING MITS-CANTER
5712-16-222-D THRUST BEARING MAZ-HA
31230-60120 THRUST BEARING TOY-2H
31230-60150 THRUST BEARING TOY-FJ80
31230-32571 THRUST BEARING TOY-3S
1304-16-510B THRUST BEARING MAZ-TITAN
MD719469-D THRUST BEARING MITS-4D56
31230-36150 THRUST BEARING COASTER
31230-32060 THRUST BEARING TOY-4AF
58SCRN37P THRUST BEARINGS TOYOTA 1KZ


Our factory:


Our Products:

Why Choose Us:

We are an industrial company.We have our own brand: SFNB .If you interested in our product,I can take you to visit our factory.
Our factory have advanced testing equipment,before the every product leave the factory,we will be testing.We can send samples to you,you can test the quality,and if you accept the sample quality,we can promise: the follow-up orders’ quality will be the same as samples.
About ordinary standard type of bearing ,We have rich inventory,not have MOQ,if your need a product is Non-standard size,need customize,we will according the product size to determine the MOQ.
Our company can accept OEM,you can send sample to me,we can manufacturing products the same as sample.Meanwhile,we also can accept some well-known brands of OEM,
If the amount of money is less,you can pay it by Paypal or Alipay.Of course you can payment by TT or Western Union etc.

The Four Basic Components of a Screw Shaft

There are 4 basic components of a screw shaft: the Head, the Thread angle, and the Threaded shank. These components determine the length, shape, and quality of a screw. Understanding how these components work together can make purchasing screws easier. This article will cover these important factors and more. Once you know these, you can select the right type of screw for your project. If you need help choosing the correct type of screw, contact a qualified screw dealer.

Thread angle

The angle of a thread on a screw shaft is the difference between the 2 sides of the thread. Threads that are unified have a 60 degree angle. Screws have 2 parts: a major diameter, also known as the screw’s outside diameter, and a minor diameter, or the screw’s root diameter. A screw or nut has a major diameter and a minor diameter. Each has its own angle, but they all have 1 thing in common – the angle of thread is measured perpendicularly to the screw’s axis.
The pitch of a screw depends on the helix angle of the thread. In a single-start screw, the lead is equal to the pitch, and the thread angle of a multiple-start screw is based on the number of starts. Alternatively, you can use a square-threaded screw. Its square thread minimizes the contact surface between the nut and the screw, which improves efficiency and performance. A square thread requires fewer motors to transfer the same load, making it a good choice for heavy-duty applications.
A screw thread has 4 components. First, there is the pitch. This is the distance between the top and bottom surface of a nut. This is the distance the thread travels in a full revolution of the screw. Next, there is the pitch surface, which is the imaginary cylinder formed by the average of the crest and root height of each tooth. Next, there is the pitch angle, which is the angle between the pitch surface and the gear axis.
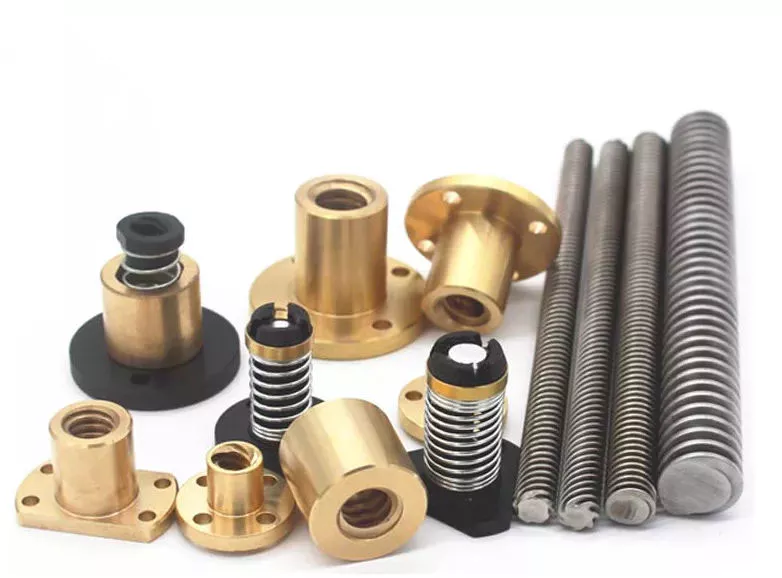
screwshaft

Head

There are 3 types of head for screws: flat, round, and hexagonal. They are used in industrial applications and have a flat outer face and a conical interior. Some varieties have a tamper-resistant pin in the head. These are usually used in the fabrication of bicycle parts. Some are lightweight, and can be easily carried from 1 place to another. This article will explain what each type of head is used for, and how to choose the right 1 for your screw.
The major diameter is the largest diameter of the thread. This is the distance between the crest and the root of the thread. The minor diameter is the smaller diameter and is the distance between the major and minor diameters. The minor diameter is half the major diameter. The major diameter is the upper surface of the thread. The minor diameter corresponds to the lower extreme of the thread. The thread angle is proportional to the distance between the major and minor diameters.
Lead screws are a more affordable option. They are easier to manufacture and less expensive than ball screws. They are also more efficient in vertical applications and low-speed operations. Some types of lead screws are also self-locking, and have a high coefficient of friction. Lead screws also have fewer parts. These types of screw shafts are available in various sizes and shapes. If you’re wondering which type of head of screw shaft to buy, this article is for you.

Threaded shank

Wood screws are made up of 2 parts: the head and the shank. The shank is not threaded all the way up. It is only partially threaded and contains the drive. This makes them less likely to overheat. Heads on wood screws include Oval, Round, Hex, Modified Truss, and Flat. Some of these are considered the “top” of the screw.
Screws come in many sizes and thread pitches. An M8 screw has a 1.25-mm thread pitch. The pitch indicates the distance between 2 identical threads. A pitch of 1 is greater than the other. The other is smaller and coarse. In most cases, the pitch of a screw is indicated by the letter M followed by the diameter in millimetres. Unless otherwise stated, the pitch of a screw is greater than its diameter.
Generally, the shank diameter is smaller than the head diameter. A nut with a drilled shank is commonly used. Moreover, a cotter pin nut is similar to a castle nut. Internal threads are usually created using a special tap for very hard metals. This tap must be followed by a regular tap. Slotted machine screws are usually sold packaged with nuts. Lastly, studs are often used in automotive and machine applications.
In general, screws with a metric thread are more difficult to install and remove. Fortunately, there are many different types of screw threads, which make replacing screws a breeze. In addition to these different sizes, many of these screws have safety wire holes to keep them from falling. These are just some of the differences between threaded screw and non-threaded. There are many different types of screw threads, and choosing the right 1 will depend on your needs and your budget.
screwshaft

Point

There are 3 types of screw heads with points: cone, oval, and half-dog. Each point is designed for a particular application, which determines its shape and tip. For screw applications, cone, oval, and half-dog points are common. Full dog points are not common, and they are available in a limited number of sizes and lengths. According to ASTM standards, point penetration contributes as much as 15% of the total holding power of the screw, but a cone-shaped point may be more preferred in some circumstances.
There are several types of set screws, each with its own advantage. Flat-head screws reduce indentation and frequent adjustment. Dog-point screws help maintain a secure grip by securing the collar to the screw shaft. Cup-point set screws, on the other hand, provide a slip-resistant connection. The diameter of a cup-point screw is usually half of its shaft diameter. If the screw is too small, it may slack and cause the screw collar to slip.
The UNF series has a larger area for tensile stress than coarse threads and is less prone to stripping. It’s used for external threads, limited engagement, and thinner walls. When using a UNF, always use a standard tap before a specialized tap. For example, a screw with a UNF point is the same size as a type C screw but with a shorter length.

Spacer

A spacer is an insulating material that sits between 2 parts and centers the shaft of a screw or other fastener. Spacers come in different sizes and shapes. Some of them are made of Teflon, which is thin and has a low coefficient of friction. Other materials used for spacers include steel, which is durable and works well in many applications. Plastic spacers are available in various thicknesses, ranging from 4.6 to 8 mm. They’re suitable for mounting gears and other items that require less contact surface.
These devices are used for precision fastening applications and are essential fastener accessories. They create clearance gaps between the 2 joined surfaces or components and enable the screw or bolt to be torqued correctly. Here’s a quick guide to help you choose the right spacer for the job. There are many different spacers available, and you should never be without one. All you need is a little research and common sense. And once you’re satisfied with your purchase, you can make a more informed decision.
A spacer is a component that allows the components to be spaced appropriately along a screw shaft. This tool is used to keep space between 2 objects, such as the spinning wheel and an adjacent metal structure. It also helps ensure that a competition game piece doesn’t rub against an adjacent metal structure. In addition to its common use, spacers can be used in many different situations. The next time you need a spacer, remember to check that the hole in your screw is threaded.
screwshaft

Nut

A nut is a simple device used to secure a screw shaft. The nut is fixed on each end of the screw shaft and rotates along its length. The nut is rotated by a motor, usually a stepper motor, which uses beam coupling to accommodate misalignments in the high-speed movement of the screw. Nuts are used to secure screw shafts to machined parts, and also to mount bearings on adapter sleeves and withdrawal sleeves.
There are several types of nut for screw shafts. Some have radial anti-backlash properties, which prevent unwanted radial clearances. In addition, they are designed to compensate for thread wear. Several nut styles are available, including anti-backlash radial nuts, which have a spring that pushes down on the nut’s flexible fingers. Axial anti-backlash nuts also provide thread-locking properties.
To install a ball nut, you must first align the tangs of the ball and nut. Then, you must place the adjusting nut on the shaft and tighten it against the spacer and spring washer. Then, you need to lubricate the threads, the ball grooves, and the spring washers. Once you’ve installed the nut, you can now install the ball screw assembly.
A nut for screw shaft can be made with either a ball or a socket. These types differ from hex nuts in that they don’t need end support bearings, and are rigidly mounted at the ends. These screws can also have internal cooling mechanisms to improve rigidity. In this way, they are easier to tension than rotating screws. You can also buy hollow stationary screws for rotator nut assemblies. This type is great for applications requiring high heat and wide temperature changes, but you should be sure to follow the manufacturer’s instructions.

China Good quality Wholesale Axle Bearing Automobile Parts Dac356535   near me factory China Good quality Wholesale Axle Bearing Automobile Parts Dac356535   near me factory

China factory Wg4005415347 HD900094100061 286010 Bth-0074A Front Wheel Bearing for Max Axle Suspension Truck Spare Parts with Good quality

Product Description

Product Description

AUTO bearing for ALL KINDS OF TRUCK,TRACTOR,TRAILER

PART NUMBER:
WG4 617546A 576467 445539AA FC12571S01 25BWD01 27BWD01J 28BWD03A
28BWD01A 30BWD08 IR8040 30BWD01A  30BWD04 GB1571S05 617546A
445539AA DAC2552W-7 BAH5AW
DAC306571RS DAC3060W DAC3063W-1 DAC3064W2RKB 
 

86CL6395F0 DZ911416
86CL6082FO 86CL6082FOC 86CL6089FOD 86NL6089FOA 92CL6093FO


 3303
  

 014255713 A 


0142508803  014255713
LRS0571  LRS00922 LRS819 LRS922 LRT0 0571  LRT668


Detailed Photos


We have factory to produce all kinds of BEARING for heavy duty truck,light truck,tractor..
We can also produce according to drawing or samples.

Packaging & Shipping

1. Packaging details: carton and wooden box packaging,woven bag,brown box, or
according to customer requirements.

2. Delivery Period: 7-30 working days after
receiving 30% deposit byTT

3. Port: HangZhou Port,China.

4. Transport: By sea, by
air,DHL,FEDEX,UPS,TNT,


FAQ

1.Q:About the payment term.
   A: We can accept TT,LC,PAYPAL,WESTERNUION,and so on

2.Q:About the Quality and price
A: We supply good quality products to all our customers,give the competitive price.

3.Q:About the warranty period
   A:At least half year, some parts are even longer.

4. Q:How to make order ?
    A:Customer can contact us online,or send email with detail inquiry list,then we can reply soon

5.Q:About the discount
A:If the quantity large,we will give resonalbe discount.And for long time cooperation customer,we can give credit support


Analytical Approaches to Estimating Contact Pressures in Spline Couplings

A spline coupling is a type of mechanical connection between 2 rotating shafts. It consists of 2 parts – a coupler and a coupling. Both parts have teeth which engage and transfer loads. However, spline couplings are typically over-dimensioned, which makes them susceptible to fatigue and static behavior. Wear phenomena can also cause the coupling to fail. For this reason, proper spline coupling design is essential for achieving optimum performance.
splineshaft

Modeling a spline coupling

Spline couplings are becoming increasingly popular in the aerospace industry, but they operate in a slightly misaligned state, causing both vibrations and damage to the contact surfaces. To solve this problem, this article offers analytical approaches for estimating the contact pressures in a spline coupling. Specifically, this article compares analytical approaches with pure numerical approaches to demonstrate the benefits of an analytical approach.
To model a spline coupling, first you create the knowledge base for the spline coupling. The knowledge base includes a large number of possible specification values, which are related to each other. If you modify 1 specification, it may lead to a warning for violating another. To make the design valid, you must create a spline coupling model that meets the specified specification values.
After you have modeled the geometry, you must enter the contact pressures of the 2 spline couplings. Then, you need to determine the position of the pitch circle of the spline. In Figure 2, the centre of the male coupling is superposed to that of the female spline. Then, you need to make sure that the alignment meshing distance of the 2 splines is the same.
Once you have the data you need to create a spline coupling model, you can begin by entering the specifications for the interface design. Once you have this data, you need to choose whether to optimize the internal spline or the external spline. You’ll also need to specify the tooth friction coefficient, which is used to determine the stresses in the spline coupling model 20. You should also enter the pilot clearance, which is the clearance between the tip 186 of a tooth 32 on 1 spline and the feature on the mating spline.
After you have entered the desired specifications for the external spline, you can enter the parameters for the internal spline. For example, you can enter the outer diameter limit 154 of the major snap 54 and the minor snap 56 of the internal spline. The values of these parameters are displayed in color-coded boxes on the Spline Inputs and Configuration GUI screen 80. Once the parameters are entered, you’ll be presented with a geometric representation of the spline coupling model 20.

Creating a spline coupling model 20

The spline coupling model 20 is created by a product model software program 10. The software validates the spline coupling model against a knowledge base of configuration-dependent specification constraints and relationships. This report is then input to the ANSYS stress analyzer program. It lists the spline coupling model 20’s geometric configurations and specification values for each feature. The spline coupling model 20 is automatically recreated every time the configuration or performance specifications of the spline coupling model 20 are modified.
The spline coupling model 20 can be configured using the product model software program 10. A user specifies the axial length of the spline stack, which may be zero, or a fixed length. The user also enters a radial mating face 148, if any, and selects a pilot clearance specification value of 14.5 degrees or 30 degrees.
A user can then use the mouse 110 to modify the spline coupling model 20. The spline coupling knowledge base contains a large number of possible specification values and the spline coupling design rule. If the user tries to change a spline coupling model, the model will show a warning about a violation of another specification. In some cases, the modification may invalidate the design.
In the spline coupling model 20, the user enters additional performance requirement specifications. The user chooses the locations where maximum torque is transferred for the internal and external splines 38 and 40. The maximum torque transfer location is determined by the attachment configuration of the hardware to the shafts. Once this is selected, the user can click “Next” to save the model. A preview of the spline coupling model 20 is displayed.
The model 20 is a representation of a spline coupling. The spline specifications are entered in the order and arrangement as specified on the spline coupling model 20 GUI screen. Once the spline coupling specifications are entered, the product model software program 10 will incorporate them into the spline coupling model 20. This is the last step in spline coupling model creation.
splineshaft

Analysing a spline coupling model 20

An analysis of a spline coupling model consists of inputting its configuration and performance specifications. These specifications may be generated from another computer program. The product model software program 10 then uses its internal knowledge base of configuration dependent specification relationships and constraints to create a valid three-dimensional parametric model 20. This model contains information describing the number and types of spline teeth 32, snaps 34, and shoulder 36.
When you are analysing a spline coupling, the software program 10 will include default values for various specifications. The spline coupling model 20 comprises an internal spline 38 and an external spline 40. Each of the splines includes its own set of parameters, such as its depth, width, length, and radii. The external spline 40 will also contain its own set of parameters, such as its orientation.
Upon selecting these parameters, the software program will perform various analyses on the spline coupling model 20. The software program 10 calculates the nominal and maximal tooth bearing stresses and fatigue life of a spline coupling. It will also determine the difference in torsional windup between an internal and an external spline. The output file from the analysis will be a report file containing model configuration and specification data. The output file may also be used by other computer programs for further analysis.
Once these parameters are set, the user enters the design criteria for the spline coupling model 20. In this step, the user specifies the locations of maximum torque transfer for both the external and internal spline 38. The maximum torque transfer location depends on the configuration of the hardware attached to the shafts. The user may enter up to 4 different performance requirement specifications for each spline.
The results of the analysis show that there are 2 phases of spline coupling. The first phase shows a large increase in stress and vibration. The second phase shows a decline in both stress and vibration levels. The third stage shows a constant meshing force between 300N and 320N. This behavior continues for a longer period of time, until the final stage engages with the surface.
splineshaft

Misalignment of a spline coupling

A study aimed to investigate the position of the resultant contact force in a spline coupling engaging teeth under a steady torque and rotating misalignment. The study used numerical methods based on Finite Element Method (FEM) models. It produced numerical results for nominal conditions and parallel offset misalignment. The study considered 2 levels of misalignment – 0.02 mm and 0.08 mm – with different loading levels.
The results showed that the misalignment between the splines and rotors causes a change in the meshing force of the spline-rotor coupling system. Its dynamics is governed by the meshing force of splines. The meshing force of a misaligned spline coupling is related to the rotor-spline coupling system parameters, the transmitting torque, and the dynamic vibration displacement.
Despite the lack of precise measurements, the misalignment of splines is a common problem. This problem is compounded by the fact that splines usually feature backlash. This backlash is the result of the misaligned spline. The authors analyzed several splines, varying pitch diameters, and length/diameter ratios.
A spline coupling is a two-dimensional mechanical system, which has positive backlash. The spline coupling is comprised of a hub and shaft, and has tip-to-root clearances that are larger than the backlash. A form-clearance is sufficient to prevent tip-to-root fillet contact. The torque on the splines is transmitted via friction.
When a spline coupling is misaligned, a torque-biased thrust force is generated. In such a situation, the force can exceed the torque, causing the component to lose its alignment. The two-way transmission of torque and thrust is modeled analytically in the present study. The analytical approach provides solutions that can be integrated into the design process. So, the next time you are faced with a misaligned spline coupling problem, make sure to use an analytical approach!
In this study, the spline coupling is analyzed under nominal conditions without a parallel offset misalignment. The stiffness values obtained are the percentage difference between the nominal pitch diameter and load application diameter. Moreover, the maximum percentage difference in the measured pitch diameter is 1.60% under a torque of 5000 N*m. The other parameter, the pitch angle, is taken into consideration in the calculation.

China factory Wg4005415347 HD900094100061 286010 Bth-0074A Front Wheel Bearing for Max Axle Suspension Truck Spare Parts   with Good qualityChina factory Wg4005415347 HD900094100061 286010 Bth-0074A Front Wheel Bearing for Max Axle Suspension Truck Spare Parts   with Good quality

China factory 52710-29461 Vkba3794 Auto Spare Part Car Accessories Rear Axle Wheel Hub Bearing Units Assemblies for Hyundai near me shop

Product Description

Product Description

BASIC INFORMATION

Description 52710-29461 VKBA3794 Auto Spare Part Car Accessories Rear Axle Wheel Hub Bearing Units Assemblies for HYUNDAI
OE Number 52710-29461
Size Inner Diameter: 28 mm
Flange Diameter: 138.9 mm
Bolt Circle Diameter: 4.50 In.
Wheel Pilot Diameter: 2.64 In.
Brake Pilot Diameter: 2.99 In.
Flange Offset: 1.84 In.
Hub Pilot Diameter: 2.64 In.
Bolt Size: M12X1.5
Bolt Quantity: 4
Bolt Hole qty: N/A
ABS Sensor: Has ABS with Tone Ring Sensor
Number of Splines: N/A
Position Rear Axle Left and Right
Brand SI, PPB
Weight 2.14 Kgs
Place of Origin ZHangZhoug, China
Certification ISO9
OPTIMAL : 922979
QUINTON HAZELL : QWB1077
RUVILLE : 8411
SPIDAN : 27076
SPIDAN : 27581

APPLICABLE CAR MODELS

Vehicle Models Cons.Type Active Years Service Engine
HYUNDAI ACCENT I (X-3) 1.3 Hatchback 1994 – 2000 75 / 55 G4DH, G4EH
HYUNDAI ACCENT I (X-3) 1.3 Hatchback 1994 – 2000 60 / 44 G4CH, G4EH
HYUNDAI ACCENT I (X-3) 1.3 i 12V Hatchback 1994 – 2000 84 / 62 G4EH
HYUNDAI ACCENT I (X-3) 1.5 i 12V Hatchback 1994 – 2000 88 / 65 G4EK
HYUNDAI ACCENT I (X-3) 1.5 i 16V Hatchback 1995 – 2000 99 / 73 G4FK

DETAILED IMAGES

PACKAGING & SHIPPING

Packaging Details 1 piece in a single box
10 boxes in a carton
40 cartons in a pallet
Nearest Port ZheJiang or HangZhou
Lead Time For stock parts: 1-5 days.
If no stock parts:
<2000 pcs: 10-20 days
≥2000 pcs: to be negotiated.


Company Profile

Our Advantages

1.ISO Standard

2.Bearing Small order accepted

3.In Stock bearing

4.OEM bearing service

5.Professional Technical Support

6.Timely pre-sale service
7.Competitive price
8.Full range of products on auto bearings
9.Punctual Delivery
11.Excellent after-sale service
 

Packaging & Shipping


The Different Types of Splines in a Splined Shaft

A splined shaft is a machine component with internal and external splines. The splines are formed in 4 different ways: Involute, Parallel, Serrated, and Ball. You can learn more about each type of spline in this article. When choosing a splined shaft, be sure to choose the right 1 for your application. Read on to learn about the different types of splines and how they affect the shaft’s performance.
splineshaft

Involute splines

Involute splines in a splined shaft are used to secure and extend mechanical assemblies. They are smooth, inwardly curving grooves that resist separation during operation. A shaft with involute splines is often longer than the shaft itself. This feature allows for more axial movement. This is beneficial for many applications, especially in a gearbox.
The involute spline is a shaped spline, similar to a parallel spline. It is angled and consists of teeth that create a spiral pattern that enables linear and rotatory motion. It is distinguished from other splines by the serrations on its flanks. It also has a flat top. It is a good option for couplers and other applications where angular movement is necessary.
Involute splines are also called involute teeth because of their shape. They are flat on the top and curved on the sides. These teeth can be either internal or external. As a result, involute splines provide greater surface contact, which helps reduce stress and fatigue. Regardless of the shape, involute splines are generally easy to machine and fit.
Involute splines are a type of splines that are used in splined shafts. These splines have different names, depending on their diameters. An example set of designations is for a 32-tooth male spline, a 2,500-tooth module, and a 30 degree pressure angle. An example of a female spline, a fillet root spline, is used to describe the diameter of the splined shaft.
The effective tooth thickness of splines is dependent on the number of keyways and the type of spline. Involute splines in splined shafts should be designed to engage 25 to 50 percent of the spline teeth during the coupling. Involute splines should be able to withstand the load without cracking.

Parallel splines

Parallel splines are formed on a splined shaft by putting 1 or more teeth into another. The male spline is positioned at the center of the female spline. The teeth of the male spline are also parallel to the shaft axis, but a common misalignment causes the splines to roll and tilt. This is common in many industrial applications, and there are a number of ways to improve the performance of splines.
Typically, parallel splines are used to reduce friction in a rotating part. The splines on a splined shaft are narrower on the end face than the interior, which makes them more prone to wear. This type of spline is used in a variety of industries, such as machinery, and it also allows for greater efficiency when transmitting torque.
Involute splines on a splined shaft are the most common. They have equally spaced teeth, and are therefore less likely to crack due to fatigue. They also tend to be easy to cut and fit. However, they are not the best type of spline. It is important to understand the difference between parallel and involute splines before deciding on which spline to use.
The difference between splined and involute splines is the size of the grooves. Involute splines are generally larger than parallel splines. These types of splines provide more torque to the gear teeth and reduce stress during operation. They are also more durable and have a longer life span. And because they are used on farm machinery, they are essential in this type of application.
splineshaft

Serrated splines

A Serrated Splined Shaft has several advantages. This type of shaft is highly adjustable. Its large number of teeth allows large torques, and its shorter tooth width allows for greater adjustment. These features make this type of shaft an ideal choice for applications where accuracy is critical. Listed below are some of the benefits of this type of shaft. These benefits are just a few of the advantages. Learn more about this type of shaft.
The process of hobbing is inexpensive and highly accurate. It is useful for external spline shafts, but is not suitable for internal splines. This type of process forms synchronized shapes on the shaft, reducing the manufacturing cycle and stabilizing the relative phase between spline and thread. It uses a grinding wheel to shape the shaft. CZPT Manufacturing has a large inventory of Serrated Splined Shafts.
The teeth of a Serrated Splined Shaft are designed to engage with the hub over the entire circumference of the shaft. The teeth of the shaft are spaced uniformly around the spline, creating a multiple-tooth point of contact over the entire length of the shaft. The results of these analyses are usually satisfactory. But there are some limitations. To begin with, the splines of the Serrated Splined Shaft should be chosen carefully. If the application requires large-scale analysis, it may be necessary to modify the design.
The splines of the Serrated Splined Shaft are also used for other purposes. They can be used to transmit torque to another device. They also act as an anti-rotational device and function as a linear guide. Both the design and the type of splines determine the function of the Splined Shaft. In the automobile industry, they are used in vehicles, aerospace, earth-moving machinery, and many other industries.

Ball splines

The invention relates to a ball-spinned shaft. The shaft comprises a plurality of balls that are arranged in a series and are operatively coupled to a load path section. The balls are capable of rolling endlessly along the path. This invention also relates to a ball bearing. Here, a ball bearing is 1 of the many types of gears. The following discussion describes the features of a ball bearing.
A ball-splined shaft assembly comprises a shaft with at least 1 ball-spline groove and a plurality of circumferential step grooves. The shaft is held in a first holding means that extends longitudinally and is rotatably held by a second holding means. Both the shaft and the first holding means are driven relative to 1 another by a first driving means. It is possible to manufacture a ball-splined shaft in a variety of ways.
A ball-splined shaft features a nut with recirculating balls. The ball-splined nut rides in these grooves to provide linear motion while preventing rotation. A splined shaft with a nut that has recirculating balls can also provide rotary motion. A ball splined shaft also has higher load capacities than a ball bushing. For these reasons, ball splines are an excellent choice for many applications.
In this invention, a pair of ball-spinned shafts are housed in a box under a carrier device 40. Each of the 2 shafts extends along a longitudinal line of arm 50. One end of each shaft is supported rotatably by a slide block 56. The slide block also has a support arm 58 that supports the center arm 50 in a cantilever fashion.
splineshaft

Sector no-go gage

A no-go gauge is a tool that checks the splined shaft for oversize. It is an effective way to determine the oversize condition of a splined shaft without removing the shaft. It measures external splines and serrations. The no-go gage is available in sizes ranging from 19mm to 130mm with a 25mm profile length.
The sector no-go gage has 2 groups of diametrally opposed teeth. The space between them is manufactured to a maximum space width and the tooth thickness must be within a predetermined tolerance. This gage would be out of tolerance if the splines were measured with a pin. The dimensions of this splined shaft can be found in the respective ANSI or DIN standards.
The go-no-go gage is useful for final inspection of thread pitch diameter. It is also useful for splined shafts and threaded nuts. The thread of a screw must match the contour of the go-no-go gage head to avoid a no-go condition. There is no substitute for a quality machine. It is an essential tool for any splined shaft and fastener manufacturer.
The NO-GO gage can detect changes in tooth thickness. It can be calibrated under ISO17025 standards and has many advantages over a non-go gage. It also gives a visual reference of the thickness of a splined shaft. When the teeth match, the shaft is considered ready for installation. It is a critical process. In some cases, it is impossible to determine the precise length of the shaft spline.
The 45-degree pressure angle is most commonly used for axles and torque-delivering members. This pressure angle is the most economical in terms of tool life, but the splines will not roll neatly like a 30 degree angle. The 45-degree spline is more likely to fall off larger than the other two. Oftentimes, it will also have a crowned look. The 37.5 degree pressure angle is a compromise between the other 2 pressure angles. It is often used when the splined shaft material is harder than usual.

China factory 52710-29461 Vkba3794 Auto Spare Part Car Accessories Rear Axle Wheel Hub Bearing Units Assemblies for Hyundai   near me shop China factory 52710-29461 Vkba3794 Auto Spare Part Car Accessories Rear Axle Wheel Hub Bearing Units Assemblies for Hyundai   near me shop

China Professional Dac42800037 Double Row Tapered Roller Wheel Bearing for Drive Axle with Hot selling

Product Description


Product Parameters

Cross reference:
90080-36087 front axle wheel bearing
90080-36136 wheel bearing front 
90080-36137 front wheel bearing
90080-36149 wheel hub bearing
90363-40066 front wheel hub bearing
90363-40069 wheel bearing assembly
90363-T0018 wheel bearings
40BVV07-10GCS japanese wheel bearing
DAC4074W-3CS80 japan bearing front wheel bearing

Specifications: 40BWD12 front wheel bearing

Inside Diameter

40 mm

Outside Diameter

74 mm

Width, Outer Race

42 mm

Location

Front Axle Transmission

Position

Left/Right

ABS Equipped

No

Generation

1

Type

Angular contact ball ,double row


Advance auto parts wheel bearing size list

P.N. d D B Mass (kg)
25BWD01 25 52 42 0.36
27BWD01J 27 60 50 0.36
28BWD03A 28 58 42 0.4
28BWD01A 28 61 42 0.53
30BWD08 30 55 26 0.26
30BWD01A 30 63 42 0.55
30BWD04 30 68 45 0.69
32BWD05 32 72 45 0.8
34BWD04B 34 64 37 0.82
34BWD11 34 64 37 0.46
34BWD10B 34 66 37 0.51
34BWD07B 34 68 42 0.64
34BWD09A 34 68 37 0.54
35BWD19E 35 65 37 0.48
35BWD07 35 68 30 0.48
35BWD07A 35 68 30 0.48
35BWD16 35 68 36 0.48
35BWD06A 35 72 31 0.55
36BWD04 36 68 33 0.48
36BWD03 36 72 42 0.68


Company Profile

HangZhou Jpg bearing & Equipment co ltd

Excellent Manufacturer of
Thin walled bearings
*The domentic Leading numerical control production equipment ensures the accuracy consisitency and stability of the products .
*Advanced production equipment and high quality tecnician team ensure the quality of bearing products .
*Advanced automation equipment ensure the quality of products while taking into account the production efficiency .
Leading Equipment

JPG Bearingis a comprehensive manufacture and service providers with world’s leading bearing manufacture process and management technique in china. We are selling all kinds of ball and roller bearings products with international standard and technology level of low noise, high load and long life. Welcome to inquiry!
 

Main products

1.Taper roller bearing

2.Deep groove ball bearing

3.cylindrical roller bearing

3.spherical roller bearing

4.linear bearing

5.pillow block bearing

6 OEM all knid of famous brand

7. Non-standard bearing


Quality Testing

Rigorous Testing

Perfect precision testing equipment ,fullly meet the requirements of bearing R&D and manufacturing .Strict and rigourour quality inspectors strictly abide by product quality standards and strictly control the whole process of products from test to prodution.

High -ending tessing equipment ,professional operation technicians and rigorous procrssing procedures an the guarantee of quality

with the unremitting purcuit of perfec products ,the company has established the industry’s top testing laboratory ,sound quality control rules,and a well -trained professional testing team.Every process from raw materials of finished products is sticklty tested to ensure high quality products. Delivere to the customer .
 

Packaging & Shipping

Packaging:
1. Neutral Package: Plastic Bag + Carton + Pallet;
2. Commercial Package: Plastic Bag + Box + Carton + Pallet;
3. As the clients’ requirement.

Delivery:
1. Less than 1000 pcs , we will send by express. ( Door to Door, Convenient ),
or by air transport. ( Fastest and safest, but expensive )
2. More than 1000pcs , we will send by sea. ( Cheapest, safe )

FAQ

FAQ
1. Can I get some samples?
A: Yes, sample is available for quality check and market test.

2. Can we do our logo or brand on the package?
A: Yes, we can do OEM.

3. What’s the delivery time?
A: It usually takes about 10-25 working days for production based on specifications for your order and quantity.

4. What’s your payment terms?
A: We usually accept T/T or L/C at sight as the main payment
terms, an d other payment can also be negotiated.

5. What’s your warranty terms?A: We offer different warranty time for different components,
please contact us for details
Payment:

1. Less than 1000 pcs , 100% T/T, Western Union in advance.
2. Between 1000-10000pcs, TT, Western Union, MoneyGram.
3. More than 10000pcs , TT, L/C ,Western Union, MoneyGram.
Dealing Process:

Send us inqry———Quotation———–Confirmation for all information———-Proforma Invoice————-Payment———–Shipping goods and documents.


How to Calculate Stiffness, Centering Force, Wear and Fatigue Failure of Spline Couplings

There are various types of spline couplings. These couplings have several important properties. These properties are: Stiffness, Involute splines, Misalignment, Wear and fatigue failure. To understand how these characteristics relate to spline couplings, read this article. It will give you the necessary knowledge to determine which type of coupling best suits your needs. Keeping in mind that spline couplings are usually spherical in shape, they are made of steel.
splineshaft

Involute splines

An effective side interference condition minimizes gear misalignment. When 2 splines are coupled with no spline misalignment, the maximum tensile root stress shifts to the left by 5 mm. A linear lead variation, which results from multiple connections along the length of the spline contact, increases the effective clearance or interference by a given percentage. This type of misalignment is undesirable for coupling high-speed equipment.
Involute splines are often used in gearboxes. These splines transmit high torque, and are better able to distribute load among multiple teeth throughout the coupling circumference. The involute profile and lead errors are related to the spacing between spline teeth and keyways. For coupling applications, industry practices use splines with 25 to 50-percent of spline teeth engaged. This load distribution is more uniform than that of conventional single-key couplings.
To determine the optimal tooth engagement for an involved spline coupling, Xiangzhen Xue and colleagues used a computer model to simulate the stress applied to the splines. The results from this study showed that a “permissible” Ruiz parameter should be used in coupling. By predicting the amount of wear and tear on a crowned spline, the researchers could accurately predict how much damage the components will sustain during the coupling process.
There are several ways to determine the optimal pressure angle for an involute spline. Involute splines are commonly measured using a pressure angle of 30 degrees. Similar to gears, involute splines are typically tested through a measurement over pins. This involves inserting specific-sized wires between gear teeth and measuring the distance between them. This method can tell whether the gear has a proper tooth profile.
The spline system shown in Figure 1 illustrates a vibration model. This simulation allows the user to understand how involute splines are used in coupling. The vibration model shows 4 concentrated mass blocks that represent the prime mover, the internal spline, and the load. It is important to note that the meshing deformation function represents the forces acting on these 3 components.
splineshaft

Stiffness of coupling

The calculation of stiffness of a spline coupling involves the measurement of its tooth engagement. In the following, we analyze the stiffness of a spline coupling with various types of teeth using 2 different methods. Direct inversion and blockwise inversion both reduce CPU time for stiffness calculation. However, they require evaluation submatrices. Here, we discuss the differences between these 2 methods.
The analytical model for spline couplings is derived in the second section. In the third section, the calculation process is explained in detail. We then validate this model against the FE method. Finally, we discuss the influence of stiffness nonlinearity on the rotor dynamics. Finally, we discuss the advantages and disadvantages of each method. We present a simple yet effective method for estimating the lateral stiffness of spline couplings.
The numerical calculation of the spline coupling is based on the semi-analytical spline load distribution model. This method involves refined contact grids and updating the compliance matrix at each iteration. Hence, it consumes significant computational time. Further, it is difficult to apply this method to the dynamic analysis of a rotor. This method has its own limitations and should be used only when the spline coupling is fully investigated.
The meshing force is the force generated by a misaligned spline coupling. It is related to the spline thickness and the transmitting torque of the rotor. The meshing force is also related to the dynamic vibration displacement. The result obtained from the meshing force analysis is given in Figures 7, 8, and 9.
The analysis presented in this paper aims to investigate the stiffness of spline couplings with a misaligned spline. Although the results of previous studies were accurate, some issues remained. For example, the misalignment of the spline may cause contact damages. The aim of this article is to investigate the problems associated with misaligned spline couplings and propose an analytical approach for estimating the contact pressure in a spline connection. We also compare our results to those obtained by pure numerical approaches.

Misalignment

To determine the centering force, the effective pressure angle must be known. Using the effective pressure angle, the centering force is calculated based on the maximum axial and radial loads and updated Dudley misalignment factors. The centering force is the maximum axial force that can be transmitted by friction. Several published misalignment factors are also included in the calculation. A new method is presented in this paper that considers the cam effect in the normal force.
In this new method, the stiffness along the spline joint can be integrated to obtain a global stiffness that is applicable to torsional vibration analysis. The stiffness of bearings can also be calculated at given levels of misalignment, allowing for accurate estimation of bearing dimensions. It is advisable to check the stiffness of bearings at all times to ensure that they are properly sized and aligned.
A misalignment in a spline coupling can result in wear or even failure. This is caused by an incorrectly aligned pitch profile. This problem is often overlooked, as the teeth are in contact throughout the involute profile. This causes the load to not be evenly distributed along the contact line. Consequently, it is important to consider the effect of misalignment on the contact force on the teeth of the spline coupling.
The centre of the male spline in Figure 2 is superposed on the female spline. The alignment meshing distances are also identical. Hence, the meshing force curves will change according to the dynamic vibration displacement. It is necessary to know the parameters of a spline coupling before implementing it. In this paper, the model for misalignment is presented for spline couplings and the related parameters.
Using a self-made spline coupling test rig, the effects of misalignment on a spline coupling are studied. In contrast to the typical spline coupling, misalignment in a spline coupling causes fretting wear at a specific position on the tooth surface. This is a leading cause of failure in these types of couplings.
splineshaft

Wear and fatigue failure

The failure of a spline coupling due to wear and fatigue is determined by the first occurrence of tooth wear and shaft misalignment. Standard design methods do not account for wear damage and assess the fatigue life with big approximations. Experimental investigations have been conducted to assess wear and fatigue damage in spline couplings. The tests were conducted on a dedicated test rig and special device connected to a standard fatigue machine. The working parameters such as torque, misalignment angle, and axial distance have been varied in order to measure fatigue damage. Over dimensioning has also been assessed.
During fatigue and wear, mechanical sliding takes place between the external and internal splines and results in catastrophic failure. The lack of literature on the wear and fatigue of spline couplings in aero-engines may be due to the lack of data on the coupling’s application. Wear and fatigue failure in splines depends on a number of factors, including the material pair, geometry, and lubrication conditions.
The analysis of spline couplings shows that over-dimensioning is common and leads to different damages in the system. Some of the major damages are wear, fretting, corrosion, and teeth fatigue. Noise problems have also been observed in industrial settings. However, it is difficult to evaluate the contact behavior of spline couplings, and numerical simulations are often hampered by the use of specific codes and the boundary element method.
The failure of a spline gear coupling was caused by fatigue, and the fracture initiated at the bottom corner radius of the keyway. The keyway and splines had been overloaded beyond their yield strength, and significant yielding was observed in the spline gear teeth. A fracture ring of non-standard alloy steel exhibited a sharp corner radius, which was a significant stress raiser.
Several components were studied to determine their life span. These components include the spline shaft, the sealing bolt, and the graphite ring. Each of these components has its own set of design parameters. However, there are similarities in the distributions of these components. Wear and fatigue failure of spline couplings can be attributed to a combination of the 3 factors. A failure mode is often defined as a non-linear distribution of stresses and strains.

China Professional Dac42800037 Double Row Tapered Roller Wheel Bearing for Drive Axle   with Hot sellingChina Professional Dac42800037 Double Row Tapered Roller Wheel Bearing for Drive Axle   with Hot selling

China factory Vkba1358 357407625A 713610730 R154.38 1004070035 Auto Wheel Bearing Kit wholesaler

Product Description

Name: VKBA 5A 71361571 R154.38 1.2 VKBA523 482A/472 VKBA 5038 35BWD16

ZheJiang  Huaxu Bearing Co.,Ltd 
Our factory specialize wheel hub bearing, wheel bearing kit, clutch bearing, taper roller bearing, truck bearing, wheel hub bearing in high quality.
Our bearings have large loading capacity and long lifetime, and widely fit in different vehicles.
wheel bearings and kits to vehicles like LADA, TOYOTA, HONDA, RENAULT, AUDI,Chevrolet, HYUNDAI,FIAT, FORD and so on.
Truck bearings applied to VOLVO, SCANIA, MAN, BENZ, DAF, SAF and so on.
And we can produce bearings which can meet your multifarious demands.
For example, wheel bearing, taper roller bearing, clutch release bearing, ball bearing, truck bearing ect.
We can provide brands like SKF, TIMKEN, FAG, NSK, KOYO, NTN, INA, NACHI, GMB, BW, GM, HYUNDAI ect.

Q:What’s your after-sales service and warranty?
A: We promise to bear the following responsibilities when defective products were found:
1.12 months warranty from the first day of receiving goods;
2. Replacements would be sent with goods of your next order;
3. Refund for defective products if customers require.

Q:Do you accept ODM&OEM orders?
A: Yes, we provide ODM&OEM services to worldwide customers, we also customize OEM box and packing as your requirements.

Q:What’s the MOQ?
A: MOQ is 10pcs for standardized products; for customized products, MOQ should be negotiated in advance. There is no MOQ for sample orders.

Q:How long is the lead time?
A: The lead time for sample orders is 3-5 days, for bulk orders is 5-15 days.

Q:Do you offer free samples? 
A: Yes we offer free samples to distributors and wholesalers, however customers should bear freight. We DO NOT offer free samples to end users. 

Q:How to place order?
A: 1. Email us the model, brand and quantity,shipping way of bearings and we will quote our best price for you; 
2. Proforma Invoice made and sent to you as the price agreed by both parts; 
3. Deposit Payment after confirming the PI and we arrange production; 
4. Balance paid before shipment or after copy of Bill of Loading.


Calculating the Deflection of a Worm Shaft

In this article, we’ll discuss how to calculate the deflection of a worm gear’s worm shaft. We’ll also discuss the characteristics of a worm gear, including its tooth forces. And we’ll cover the important characteristics of a worm gear. Read on to learn more! Here are some things to consider before purchasing a worm gear. We hope you enjoy learning! After reading this article, you’ll be well-equipped to choose a worm gear to match your needs.
worm shaft

Calculation of worm shaft deflection

The main goal of the calculations is to determine the deflection of a worm. Worms are used to turn gears and mechanical devices. This type of transmission uses a worm. The worm diameter and the number of teeth are inputted into the calculation gradually. Then, a table with proper solutions is shown on the screen. After completing the table, you can then move on to the main calculation. You can change the strength parameters as well.
The maximum worm shaft deflection is calculated using the finite element method (FEM). The model has many parameters, including the size of the elements and boundary conditions. The results from these simulations are compared to the corresponding analytical values to calculate the maximum deflection. The result is a table that displays the maximum worm shaft deflection. The tables can be downloaded below. You can also find more information about the different deflection formulas and their applications.
The calculation method used by DIN EN 10084 is based on the hardened cemented worm of 16MnCr5. Then, you can use DIN EN 10084 (CuSn12Ni2-C-GZ) and DIN EN 1982 (CuAl10Fe5Ne5-C-GZ). Then, you can enter the worm face width, either manually or using the auto-suggest option.
Common methods for the calculation of worm shaft deflection provide a good approximation of deflection but do not account for geometric modifications on the worm. While Norgauer’s 2021 approach addresses these issues, it fails to account for the helical winding of the worm teeth and overestimates the stiffening effect of gearing. More sophisticated approaches are required for the efficient design of thin worm shafts.
Worm gears have a low noise and vibration compared to other types of mechanical devices. However, worm gears are often limited by the amount of wear that occurs on the softer worm wheel. Worm shaft deflection is a significant influencing factor for noise and wear. The calculation method for worm gear deflection is available in ISO/TR 14521, DIN 3996, and AGMA 6022.
The worm gear can be designed with a precise transmission ratio. The calculation involves dividing the transmission ratio between more stages in a gearbox. Power transmission input parameters affect the gearing properties, as well as the material of the worm/gear. To achieve a better efficiency, the worm/gear material should match the conditions that are to be experienced. The worm gear can be a self-locking transmission.
The worm gearbox contains several machine elements. The main contributors to the total power loss are the axial loads and bearing losses on the worm shaft. Hence, different bearing configurations are studied. One type includes locating/non-locating bearing arrangements. The other is tapered roller bearings. The worm gear drives are considered when locating versus non-locating bearings. The analysis of worm gear drives is also an investigation of the X-arrangement and four-point contact bearings.
worm shaft

Influence of tooth forces on bending stiffness of a worm gear

The bending stiffness of a worm gear is dependent on tooth forces. Tooth forces increase as the power density increases, but this also leads to increased worm shaft deflection. The resulting deflection can affect efficiency, wear load capacity, and NVH behavior. Continuous improvements in bronze materials, lubricants, and manufacturing quality have enabled worm gear manufacturers to produce increasingly high power densities.
Standardized calculation methods take into account the supporting effect of the toothing on the worm shaft. However, overhung worm gears are not included in the calculation. In addition, the toothing area is not taken into account unless the shaft is designed next to the worm gear. Similarly, the root diameter is treated as the equivalent bending diameter, but this ignores the supporting effect of the worm toothing.
A generalized formula is provided to estimate the STE contribution to vibratory excitation. The results are applicable to any gear with a meshing pattern. It is recommended that engineers test different meshing methods to obtain more accurate results. One way to test tooth-meshing surfaces is to use a finite element stress and mesh subprogram. This software will measure tooth-bending stresses under dynamic loads.
The effect of tooth-brushing and lubricant on bending stiffness can be achieved by increasing the pressure angle of the worm pair. This can reduce tooth bending stresses in the worm gear. A further method is to add a load-loaded tooth-contact analysis (CCTA). This is also used to analyze mismatched ZC1 worm drive. The results obtained with the technique have been widely applied to various types of gearing.
In this study, we found that the ring gear’s bending stiffness is highly influenced by the teeth. The chamfered root of the ring gear is larger than the slot width. Thus, the ring gear’s bending stiffness varies with its tooth width, which increases with the ring wall thickness. Furthermore, a variation in the ring wall thickness of the worm gear causes a greater deviation from the design specification.
To understand the impact of the teeth on the bending stiffness of a worm gear, it is important to know the root shape. Involute teeth are susceptible to bending stress and can break under extreme conditions. A tooth-breakage analysis can control this by determining the root shape and the bending stiffness. The optimization of the root shape directly on the final gear minimizes the bending stress in the involute teeth.
The influence of tooth forces on the bending stiffness of a worm gear was investigated using the CZPT Spiral Bevel Gear Test Facility. In this study, multiple teeth of a spiral bevel pinion were instrumented with strain gages and tested at speeds ranging from static to 14400 RPM. The tests were performed with power levels as high as 540 kW. The results obtained were compared with the analysis of a three-dimensional finite element model.
worm shaft

Characteristics of worm gears

Worm gears are unique types of gears. They feature a variety of characteristics and applications. This article will examine the characteristics and benefits of worm gears. Then, we’ll examine the common applications of worm gears. Let’s take a look! Before we dive in to worm gears, let’s review their capabilities. Hopefully, you’ll see how versatile these gears are.
A worm gear can achieve massive reduction ratios with little effort. By adding circumference to the wheel, the worm can greatly increase its torque and decrease its speed. Conventional gearsets require multiple reductions to achieve the same reduction ratio. Worm gears have fewer moving parts, so there are fewer places for failure. However, they can’t reverse the direction of power. This is because the friction between the worm and wheel makes it impossible to move the worm backwards.
Worm gears are widely used in elevators, hoists, and lifts. They are particularly useful in applications where stopping speed is critical. They can be incorporated with smaller brakes to ensure safety, but shouldn’t be relied upon as a primary braking system. Generally, they are self-locking, so they are a good choice for many applications. They also have many benefits, including increased efficiency and safety.
Worm gears are designed to achieve a specific reduction ratio. They are typically arranged between the input and output shafts of a motor and a load. The 2 shafts are often positioned at an angle that ensures proper alignment. Worm gear gears have a center spacing of a frame size. The center spacing of the gear and worm shaft determines the axial pitch. For instance, if the gearsets are set at a radial distance, a smaller outer diameter is necessary.
Worm gears’ sliding contact reduces efficiency. But it also ensures quiet operation. The sliding action limits the efficiency of worm gears to 30% to 50%. A few techniques are introduced herein to minimize friction and to produce good entrance and exit gaps. You’ll soon see why they’re such a versatile choice for your needs! So, if you’re considering purchasing a worm gear, make sure you read this article to learn more about its characteristics!
An embodiment of a worm gear is described in FIGS. 19 and 20. An alternate embodiment of the system uses a single motor and a single worm 153. The worm 153 turns a gear which drives an arm 152. The arm 152, in turn, moves the lens/mirr assembly 10 by varying the elevation angle. The motor control unit 114 then tracks the elevation angle of the lens/mirr assembly 10 in relation to the reference position.
The worm wheel and worm are both made of metal. However, the brass worm and wheel are made of brass, which is a yellow metal. Their lubricant selections are more flexible, but they’re limited by additive restrictions due to their yellow metal. Plastic on metal worm gears are generally found in light load applications. The lubricant used depends on the type of plastic, as many types of plastics react to hydrocarbons found in regular lubricant. For this reason, you need a non-reactive lubricant.

China factory Vkba1358 357407625A 713610730 R154.38 1004070035 Auto Wheel Bearing Kit   wholesaler China factory Vkba1358 357407625A 713610730 R154.38 1004070035 Auto Wheel Bearing Kit   wholesaler

China best Auto Parts Accessories Front Axle Wheel Hub Bearing Unit Assembly Hub Unit and Bearing Car with Best Sales

Product Description

Products Description

Standard ISO/BS/JIS/SGS/ROSH
Quality guarantee 12 months
Leading time 30 days
MOQ 100pcs
Advantage 1.Aftermarket Supplier
2.Factory Price 

3.Large Stock
4.Small Orders Are Also Welcome
5.Great Supplying Ability
6.Delivery On Time
7.Professional
8.Perfect Service for

Packing

Neutral carton 

Custom packaging:Custom Made Box or Logo

Extra protective: Pallet ,Wooden Case

Our Factory 5000 m² factory
200 Professional worker
20 Factory lines 5 QC lines

Advanced machinery and equipment

Our advantage

1. High Quality and competitive price, we dare not say our products are the best, but we assure that the quality and the price is reasonable.

2. OEM quality standard, no noise, with long service life.
3. Can develop according customers’ clutch cover drawing and samples.
4.Clutch disc and clutch cover quality guarantee: for all incoming materials and component is strictly controlled.
with every time undergoing self inspection in addition finished products are inspected before being approved for delivery to customers .
5.Forty-5 Pre-Delivery Inspection,Export Brand New Vehicle with Clean Cab.
6.Export Vehicle with Full Wax Protection,Reasonable Packing.

7.Have Senior Engineers with over 20 Years’ Working Experience

8. Offer Operation and Maintenance Training
9. Have No Limit of Order Quantity.

10. Logo an be added as customer’s own design.

The quality of the original car is trustworthy.


Solve the problem

  • Poor comfort
  • Over bend tilt
  • Abnomal noise
  • Driving jitter
  • Oil Leaking

What Are Worm Gears and Worm Shafts?

If you’re looking for a fishing reel with a worm gear system, you’ve probably come across the term ‘worm gear’. But what are worm gears and worm shafts? And what are the advantages and disadvantages of worm gears? Let’s take a closer look! Read on to learn more about worm gears and shafts! Then you’ll be well on your way to purchasing a reel with a worm gear system.
worm shaft

worm gear reducers

Worm shaft reducers have a number of advantages over conventional gear reduction mechanisms. First, they’re highly efficient. While single stage worm reducers have a maximum reduction ratio of about 5 to 60, hypoid gears can typically go up to a maximum of 1 hundred and 20 times. A worm shaft reducer is only as efficient as the gearing it utilizes. This article will discuss some of the advantages of using a hypoid gear set, and how it can benefit your business.
To assemble a worm shaft reducer, first remove the flange from the motor. Then, remove the output bearing carrier and output gear assembly. Lastly, install the intermediate worm assembly through the bore opposite to the attachment housing. Once installed, you should carefully remove the bearing carrier and the gear assembly from the motor. Don’t forget to remove the oil seal from the housing and motor flange. During this process, you must use a small hammer to tap around the face of the plug near the outside diameter of the housing.
Worm gears are often used in reversing prevention systems. The backlash of a worm gear can increase with wear. However, a duplex worm gear was designed to address this problem. This type of gear requires a smaller backlash but is still highly precise. It uses different leads for the opposing tooth face, which continuously alters its tooth thickness. Worm gears can also be adjusted axially.

worm gears

There are a couple of different types of lubricants that are used in worm gears. The first, polyalkylene glycols, are used in cases where high temperature is not a concern. This type of lubricant does not contain any waxes, which makes it an excellent choice in low-temperature applications. However, these lubricants are not compatible with mineral oils or some types of paints and seals. Worm gears typically feature a steel worm and a brass wheel. The brass wheel is much easier to remodel than steel and is generally modeled as a sacrificial component.
The worm gear is most effective when it is used in small and compact applications. Worm gears can greatly increase torque or reduce speed, and they are often used where space is an issue. Worm gears are among the smoothest and quietest gear systems on the market, and their meshing effectiveness is excellent. However, the worm gear requires high-quality manufacturing to perform at its highest levels. If you’re considering a worm gear for a project, it’s important to make sure that you find a manufacturer with a long and high quality reputation.
The pitch diameters of both worm and pinion gears must match. The 2 worm cylinders in a worm wheel have the same pitch diameter. The worm wheel shaft has 2 pitch cylinders and 2 threads. They are similar in pitch diameter, but have different advancing angles. A self-locking worm gear, also known as a wormwheel, is usually self-locking. Moreover, self-locking worm gears are easy to install.

worm shafts

The deflection of worm shafts varies with toothing parameters. In addition to toothing length, worm gear size and pressure angle, worm gear size and number of helical threads are all influencing factors. These variations are modeled in the standard ISO/TS 14521 reference gear. This table shows the variations in each parameter. The ID indicates the worm shaft’s center distance. In addition, a new calculation method is presented for determining the equivalent bending diameter of the worm.
The deflection of worm shafts is investigated using a four-stage process. First, the finite element method is used to compute the deflection of a worm shaft. Then, the worm shaft is experimentally tested, comparing the results with the corresponding simulations. The final stage of the simulation is to consider the toothing geometry of 15 different worm gear toothings. The results of this step confirm the modeled results.
The lead on the right and left tooth surfaces of worms is the same. However, the lead can be varied along the worm shaft. This is called dual lead worm gear, and is used to eliminate play in the main worm gear of hobbing machines. The pitch diameters of worm modules are equal. The same principle applies to their pitch diameters. Generally, the lead angle increases as the number of threads decreases. Hence, the larger the lead angle, the less self-locking it becomes.
worm shaft

worm gears in fishing reels

Fishing reels usually include worm shafts as a part of the construction. Worm shafts in fishing reels allow for uniform worm winding. The worm shaft is attached to a bearing on the rear wall of the reel unit through a hole. The worm shaft’s front end is supported by a concave hole in the front of the reel unit. A conventional fishing reel may also have a worm shaft attached to the sidewall.
The gear support portion 29 supports the rear end of the pinion gear 12. It is a thick rib that protrudes from the lid portion 2 b. It is mounted on a bushing 14 b, which has a through hole through which the worm shaft 20 passes. This worm gear supports the worm. There are 2 types of worm gears available for fishing reels. The 2 types of worm gears may have different number of teeth or they may be the same.
Typical worm shafts are made of stainless steel. Stainless steel worm shafts are especially corrosion-resistant and durable. Worm shafts are used on spinning reels, spin-casting reels, and in many electrical tools. A worm shaft can be reversible, but it is not entirely reliable. There are numerous benefits of worm shafts in fishing reels. These fishing reels also feature a line winder or level winder.

worm gears in electrical tools

Worms have different tooth shapes that can help increase the load carrying capacity of a worm gear. Different tooth shapes can be used with circular or secondary curve cross sections. The pitch point of the cross section is the boundary for this type of mesh. The mesh can be either positive or negative depending on the desired torque. Worm teeth can also be inspected by measuring them over pins. In many cases, the lead thickness of a worm can be adjusted using a gear tooth caliper.
The worm shaft is fixed to the lower case section 8 via a rubber bush 13. The worm wheel 3 is attached to the joint shaft 12. The worm 2 is coaxially attached to the shaft end section 12a. This joint shaft connects to a swing arm and rotates the worm wheel 3.
The backlash of a worm gear may be increased if the worm is not mounted properly. To fix the problem, manufacturers have developed duplex worm gears, which are suitable for small backlash applications. Duplex worm gears utilize different leads on each tooth face for continuous change in tooth thickness. In this way, the center distance of the worm gear can be adjusted without changing the worm’s design.

worm gears in engines

Using worm shafts in engines has a few benefits. First of all, worm gears are quiet. The gear and worm face move in opposite directions so the energy transferred is linear. Worm gears are popular in applications where torque is important, such as elevators and lifts. Worm gears also have the advantage of being made from soft materials, making them easy to lubricate and to use in applications where noise is a concern.
Lubricants are necessary for worm gears. The viscosity of lubricants determines whether the worm is able to touch the gear or wheel. Common lubricants are ISO 680 and 460, but higher viscosity oil is not uncommon. It is essential to use the right lubricants for worm gears, since they cannot be lubricated indefinitely.
Worm gears are not recommended for engines due to their limited performance. The worm gear’s spiral motion causes a significant reduction in space, but this requires a high amount of lubrication. Worm gears are susceptible to breaking down because of the stress placed on them. Moreover, their limited speed can cause significant damage to the gearbox, so careful maintenance is essential. To make sure worm gears remain in top condition, you should inspect and clean them regularly.
worm shaft

Methods for manufacturing worm shafts

A novel approach to manufacturing worm shafts and gearboxes is provided by the methods of the present invention. Aspects of the technique involve manufacturing the worm shaft from a common worm shaft blank having a defined outer diameter and axial pitch. The worm shaft blank is then adapted to the desired gear ratio, resulting in a gearbox family with multiple gear ratios. The preferred method for manufacturing worm shafts and gearboxes is outlined below.
A worm shaft assembly process may involve establishing an axial pitch for a given frame size and reduction ratio. A single worm shaft blank typically has an outer diameter of 100 millimeters, which is the measurement of the worm gear set’s center distance. Upon completion of the assembly process, the worm shaft has the desired axial pitch. Methods for manufacturing worm shafts include the following:
For the design of the worm gear, a high degree of conformity is required. Worm gears are classified as a screw pair in the lower pairs. Worm gears have high relative sliding, which is advantageous when comparing them to other types of gears. Worm gears require good surface finish and rigid positioning. Worm gear lubrication usually comprises surface active additives such as silica or phosphor-bronze. Worm gear lubricants are often mixed. The lubricant film that forms on the gear teeth has little impact on wear and is generally a good lubricant.

China best Auto Parts Accessories Front Axle Wheel Hub Bearing Unit Assembly Hub Unit and Bearing Car   with Best SalesChina best Auto Parts Accessories Front Axle Wheel Hub Bearing Unit Assembly Hub Unit and Bearing Car   with Best Sales

China manufacturer Rear Axle Hub Bearing 42410-02020 42410-12090 512018 for Japanese Car Wheel Parts with Hot selling

Product Description

Surface Treatment polishing
Size Drawing
Certificate ISO9001:2008; TS16949
MOQ 1 sets
Packing Customized
Sample Available
Lead time 10~30days depend on order


1.Q:Are you trading company or manufacturer?
A: We are factory with more then 15years experience
2.Q: How long is your delivery time?
A: Generally it is 15-30days as we are Customized service we confirm with Customer
when place order
3.Q:Do you provide samples? ls it free or extra?
A: Yes we provide samples .for sample charge as per sample condition to decide free
or charged ,usually for not too much time used consumed machining process are free
4.Q:What is your terms of payment?
30% T/T in advance balance before shipment .Or as per discussion
5.Q: Can we know the production process without visiting the factory?
A:We will offer detailed production schedule and send weekly reports with digital
pictures and videos which show the machining progress
6.Q:Available for customized design drawings?
A: YesDWG.DXF.DXW.IGES.STEP. PDF etc
7.Q:Available for customized design drawings?
A: Yes ,we can sign the NDA before your send the drawing
8.Q:How do you guarantee the quality?
A:(1) Checking the raw material after they reach our factory——
Incoming quality control(IQC)
(2) Checking the details before the production line operated
(3) Have a full inspection and routing inspection during mass production—
In-process quality control(IPQC)
(4) Checking the goods after they are finished—- Final quality control(FQC)
(5) Checking the goods after they are finished—–Outgoing quality control(QC)
(6)100% inspection and delivery before shipment.

The Benefits of Spline Couplings for Disc Brake Mounting Interfaces

Spline couplings are commonly used for securing disc brake mounting interfaces. Spline couplings are often used in high-performance vehicles, aeronautics, and many other applications. However, the mechanical benefits of splines are not immediately obvious. Listed below are the benefits of spline couplings. We’ll discuss what these advantages mean for you. Read on to discover how these couplings work.

Disc brake mounting interfaces are splined

There are 2 common disc brake mounting interfaces – splined and six-bolt. Splined rotors fit on splined hubs; six-bolt rotors will need an adapter to fit on six-bolt hubs. The six-bolt method is easier to maintain and may be preferred by many cyclists. If you’re thinking of installing a disc brake system, it is important to know how to choose the right splined and center lock interfaces.
splineshaft

Aerospace applications

The splines used for spline coupling in aircraft are highly complex. While some previous researches have addressed the design of splines, few publications have tackled the problem of misaligned spline coupling. Nevertheless, the accurate results we obtained were obtained using dedicated simulation tools, which are not commercially available. Nevertheless, such tools can provide a useful reference for our approach. It would be beneficial if designers could use simple tools for evaluating contact pressure peaks. Our analytical approach makes it possible to find answers to such questions.
The design of a spline coupling for aerospace applications must be accurate to minimize weight and prevent failure mechanisms. In addition to weight reduction, it is necessary to minimize fretting fatigue. The pressure distribution on the spline coupling teeth is a significant factor in determining its fretting fatigue. Therefore, we use analytical and experimental methods to examine the contact pressure distribution in the axial direction of spline couplings.
The teeth of a spline coupling can be categorized by the type of engagement they provide. This study investigates the position of resultant contact forces in the teeth of a spline coupling when applied to pitch diameter. Using FEM models, numerical results are generated for nominal and parallel offset misalignments. The axial tooth profile determines the behavior of the coupling component and its ability to resist wear. Angular misalignment is also a concern, causing misalignment.
In order to assess wear damage of a spline coupling, we must take into consideration the impact of fretting on the components. This wear is caused by relative motion between the teeth that engage them. The misalignment may be caused by vibrations, cyclical tooth deflection, or angular misalignment. The result of this analysis may help designers improve their spline coupling designs and develop improved performance.
CZPT polyimide, an abrasion-resistant polymer, is a popular choice for high-temperature spline couplings. This material reduces friction and wear, provides a low friction surface, and has a low wear rate. Furthermore, it offers up to 50 times the life of metal on metal spline connections. For these reasons, it is important to choose the right material for your spline coupling.
splineshaft

High-performance vehicles

A spline coupler is a device used to connect splined shafts. A typical spline coupler resembles a short pipe with splines on either end. There are 2 basic types of spline coupling: single and dual spline. One type attaches to a drive shaft, while the other attaches to the gearbox. While spline couplings are typically used in racing, they’re also used for performance problems.
The key challenge in spline couplings is to determine the optimal dimension of spline joints. This is difficult because no commercial codes allow the simulation of misaligned joints, which can destroy components. This article presents analytical approaches to estimating contact pressures in spline connections. The results are comparable with numerical approaches but require special codes to accurately model the coupling operation. This research highlights several important issues and aims to make the application of spline couplings in high-performance vehicles easier.
The stiffness of spline assemblies can be calculated using tooth-like structures. Such splines can be incorporated into the spline joint to produce global stiffness for torsional vibration analysis. Bearing reactions are calculated for a certain level of misalignment. This information can be used to design bearing dimensions and correct misalignment. There are 3 types of spline couplings.
Major diameter fit splines are made with tightly controlled outside diameters. This close fit provides concentricity transfer from the male to the female spline. The teeth of the male spline usually have chamfered tips and clearance with fillet radii. These splines are often manufactured from billet steel or aluminum. These materials are renowned for their strength and uniform grain created by the forging process. ANSI and DIN design manuals define classes of fit.
splineshaft

Disc brake mounting interfaces

A spline coupling for disc brake mounting interfaces is a type of hub-to-brake-disc mount. It is a highly durable coupling mechanism that reduces heat transfer from the disc to the axle hub. The mounting arrangement also isolates the axle hub from direct contact with the disc. It is also designed to minimize the amount of vehicle downtime and maintenance required to maintain proper alignment.
Disc brakes typically have substantial metal-to-metal contact with axle hub splines. The discs are held in place on the hub by intermediate inserts. This metal-to-metal contact also aids in the transfer of brake heat from the brake disc to the axle hub. Spline coupling for disc brake mounting interfaces comprises a mounting ring that is either a threaded or non-threaded spline.
During drag brake experiments, perforated friction blocks filled with various additive materials are introduced. The materials included include Cu-based powder metallurgy material, a composite material, and a Mn-Cu damping alloy. The filling material affects the braking interface’s wear behavior and friction-induced vibration characteristics. Different filling materials produce different types of wear debris and have different wear evolutions. They also differ in their surface morphology.
Disc brake couplings are usually made of 2 different types. The plain and HD versions are interchangeable. The plain version is the simplest to install, while the HD version has multiple components. The two-piece couplings are often installed at the same time, but with different mounting interfaces. You should make sure to purchase the appropriate coupling for your vehicle. These interfaces are a vital component of your vehicle and must be installed correctly for proper operation.
Disc brakes use disc-to-hub elements that help locate the forces and displace them to the rim. These elements are typically made of stainless steel, which increases the cost of manufacturing the disc brake mounting interface. Despite their benefits, however, the high braking force loads they endure are hard on the materials. Moreover, excessive heat transferred to the intermediate elements can adversely affect the fatigue life and long-term strength of the brake system.

China manufacturer Rear Axle Hub Bearing 42410-02020 42410-12090 512018 for Japanese Car Wheel Parts   with Hot sellingChina manufacturer Rear Axle Hub Bearing 42410-02020 42410-12090 512018 for Japanese Car Wheel Parts   with Hot selling

China Professional for Honda Civic Car Spare Part Front Axle Wheel Hub Bearing Vkba7469 43X78X44mm 44300-Sna-951 near me factory

Product Description

Basic information:

Description HONDA CIVIC Car Spare Part Front Axle Wheel Hub Bearing VKBA7469 43x78x44mm 44300-SNA-951
Material Chrome steel Gcr15
Application For HONDA
Size Inner: 43mm
Outer: 78mm
Width: 44mm
Position Front wheel hub bearing
With ABS Yes
Weight 0.9kg
Brand SI, PPB, or customized
Packing Neutral, SI, PPB brand packing or customized
OEM/ODM service Yes
Manufacture place ZHangZhoug, China
MOQ 50 PCS
OEM replacement Yes
Inspection 100%
Warranty 1 year or 40,000-50,000 KMS
Certificate ISO9001:2015 TS16949
Payment T/T, PayPal, Alibaba
Features Specialized features/benefits
Less vibration and noise
Less energy consumption
Quality approvals
Improved fatigue life
Reduced noise vibration
Super finished raceways

Detailed pictures:

O.E.:
44300-SMG-G01
44300-SNA-951
44300-SNA-952
44300-TR0-951
44300-TR0-952
44300-TS4-951
44300-TV0-E01

Ref.:
For FAG: 
For FAG: 
For FEBI BILSTEIN: 31451
For OPTIMAL: 911299
For OPTIMAL: 911643
For SKF: VKBA 7469
For SNR: R174.42
For SNR: R174.68

Application:
For HONDA CIVIC IX  2011-
For HONDA CIVIC VIII 2005-

Packing and Delivery:

Plant View:

Exhibitions:

FAQ:
Q1.What is your shipping logistic?
Re: DHL, TNT, FedEx express, by air/sea/train.

Q2:What’s the MOQ?
Re: For the wheel hub bearing repair kit. The MOQ is always 50-100 sets. If ordering together with other models, small quantities can be organized. But need more time due to the production schedule.

Q3. What are your goods of packing?
Re: Generally, our goods will be packed in Neutral white or brown boxes for the hub bearing unit. Our brand packing SI & CZPT are offered. If you have any other packing requests, we shall also handle them.

Q4. What is your sample policy?
Re: We can supply the sample if we have ready parts in stock.

Q5. Do you have any certificates?
Re: Yes, we have the certificate of ISO9001:2015.

Q6:Any warranty of your products.
Re: Sure, We are offering a guarantee for 12 months or 40,000-50,000 km for the aftermarket.

Q7:When are you going to deliver?
A: Sample: 5-15 business days after payment is confirmed.
Bulk order:15-60 workdays after deposit received…

Q8:What’s your delivery way?
A: By sea, by air, by train, express as your need.

Q9:What are your terms of delivery?
A: EXW, FOB, CFR, CIF, DAP, etc.

Q10:Can you support the sample order?
A: Yes, we can supply the sample if we have parts in stock, but the customer has to pay the sample payment(according to the value of the samples) and the shipping cost.

Q11:What are you going to do if there has a claim for the quality or quantity missing?
A: 1. For quality, during the warranty period, if any claim for it, we shall help the customer to find out what’s the exact problem. Using by mistake, installation problem, or poor quality? Once it’s due to the poor quality, we will arrange the new products to customers.
2. For missing quantities, there have 2 weeks for claiming the missing ones after receiving the goods. We shall help to find out where it is.


Lead Screws and Clamp Style Collars

If you have a lead screw, you’re probably interested in learning about the Acme thread on this type of shaft. You might also be interested in finding out about the Clamp style collars and Ball screw nut. But before you buy a new screw, make sure you understand what the terminology means. Here are some examples of screw shafts:

Acme thread

The standard ACME thread on a screw shaft is made of a metal that is resistant to corrosion and wear. It is used in a variety of applications. An Acme thread is available in a variety of sizes and styles. General purpose Acme threads are not designed to handle external radial loads and are supported by a shaft bearing and linear guide. Their design is intended to minimize the risk of flank wedging, which can cause friction forces and wear. The Centralizing Acme thread standard caters to applications without radial support and allows the thread to come into contact before its flanks are exposed to radial loads.
The ACME thread was first developed in 1894 for machine tools. While the acme lead screw is still the most popular screw in the US, European machines use the Trapezoidal Thread (Metric Acme). The acme thread is a stronger and more resilient alternative to square threads. It is also easier to cut than square threads and can be cut by using a single-point threading die.
Similarly to the internal threads, the metric versions of Acme are similar to their American counterparts. The only difference is that the metric threads are generally wider and are used more frequently in industrial settings. However, the metric-based screw threads are more common than their American counterparts worldwide. In addition, the Acme thread on screw shafts is used most often on external gears. But there is still a small minority of screw shafts that are made with a metric thread.
ACME screws provide a variety of advantages to users, including self-lubrication and reduced wear and tear. They are also ideal for vertical applications, where a reduced frictional force is required. In addition, ACME screws are highly resistant to back-drive and minimize the risk of backlash. Furthermore, they can be easily checked with readily available thread gauges. So, if you’re looking for a quality ACME screw for your next industrial project, look no further than ACME.
screwshaft

Lead screw coatings

The properties of lead screw materials affect their efficiency. These materials have high anti-corrosion, thermal resistance, and self-lubrication properties, which eliminates the need for lubrication. These coating materials include polytetrafluoroethylene (PFE), polyether ether ketone (PEK), and Vespel. Other desirable properties include high tensile strength, corrosion resistance, and rigidity.
The most common materials for lead screws are carbon steel, stainless steel, and aluminum. Lead screw coatings can be PTFE-based to withstand harsh environments and remove oil and grease. In addition to preventing corrosion, lead screw coatings improve the life of polymer parts. Lead screw assembly manufacturers offer a variety of customization options for their lead screw, including custom-molded nuts, thread forms, and nut bodies.
Lead screws are typically measured in rpm, or revolutions per minute. The PV curve represents the inverse relationship between contact surface pressure and sliding velocity. This value is affected by the material used in the construction of the screw, lubrication conditions, and end fixity. The critical speed of lead screws is determined by their length and minor diameter. End fixity refers to the support for the screw and affects its rigidity and critical speed.
The primary purpose of lead screws is to enable smooth movement. To achieve this, lead screws are usually preloaded with axial load, enabling consistent contact between a screw’s filets and nuts. Lead screws are often used in linear motion control systems and feature a large area of sliding contact between male and female threads. Lead screws can be manually operated or mortised and are available in a variety of sizes and materials. The materials used for lead screws include stainless steel and bronze, which are often protected by a PTFE type coating.
These screws are made of various materials, including stainless steel, bronze, and various plastics. They are also made to meet specific requirements for environmental conditions. In addition to lead screws, they can be made of stainless steel, aluminum, and carbon steel. Surface coatings can improve the screw’s corrosion resistance, while making it more wear resistant in tough environments. A screw that is coated with PTFE will maintain its anti-corrosion properties even in tough environments.
screwshaft

Clamp style collars

The screw shaft clamp style collar is a basic machine component, which is attached to the shaft via multiple screws. These collars act as mechanical stops, load bearing faces, or load transfer points. Their simple design makes them easy to install. This article will discuss the pros and cons of this style of collar. Let’s look at what you need to know before choosing a screw shaft clamp style collar. Here are some things to keep in mind.
Clamp-style shaft collars are a versatile mounting option for shafts. They have a recessed screw that fully engages the thread for secure locking. Screw shaft clamp collars come in different styles and can be used in both drive and power transmission applications. Listed below are the main differences between these 2 styles of collars. They are compatible with all types of shafts and are able to handle axial loads of up to 5500 pounds.
Clamp-style shaft collars are designed to prevent the screw from accidentally damaging the shaft when tightened. They can be tightened with a set screw to counteract the initial clamping force and prevent the shaft from coming loose. However, when tightening the screw, you should use a torque wrench. Using a set screw to tighten a screw shaft collar can cause it to warp and reduce the surface area that contacts the shaft.
Another key advantage to Clamp-style shaft collars is that they are easy to install. Clamp-style collars are available in one-piece and two-piece designs. These collars lock around the shaft and are easy to remove and install. They are ideal for virtually any shaft and can be installed without removing any components. This type of collar is also recommended for those who work on machines with sensitive components. However, be aware that the higher the OD, the more difficult it is to install and remove the collar.
Screw shaft clamp style collars are usually one-piece. A two-piece collar is easier to install than a one-piece one. The two-piece collars provide a more effective clamping force, as they use the full seating torque. Two-piece collars have the added benefit of being easy to install because they require no tools to install. You can disassemble one-piece collars before installing a two-piece collar.
screwshaft

Ball screw nut

The proper installation of a ball screw nut requires that the nut be installed on the center of the screw shaft. The return tubes of the ball nut must be oriented upward so that the ball nut will not overtravel. The adjusting nut must be tightened against a spacer or spring washer, then the nut is placed on the screw shaft. The nut should be rotated several times in both directions to ensure that it is centered.
Ball screw nuts are typically manufactured with a wide range of preloads. Large preloads are used to increase the rigidity of a ball screw assembly and prevent backlash, the lost motion caused by a clearance between the ball and nut. Using a large amount of preload can lead to excessive heat generation. The most common preload for ball screw nuts is 1 to 3%. This is usually more than enough to prevent backlash, but a higher preload will increase torque requirements.
The diameter of a ball screw is measured from its center, called the ball circle diameter. This diameter represents the distance a ball will travel during 1 rotation of the screw shaft. A smaller diameter means that there are fewer balls to carry the load. Larger leads mean longer travels per revolution and higher speeds. However, this type of screw cannot carry a greater load capacity. Increasing the length of the ball nut is not practical, due to manufacturing constraints.
The most important component of a ball screw is a ball bearing. This prevents excessive friction between the ball and the nut, which is common in lead-screw and nut combinations. Some ball screws feature preloaded balls, which avoid “wiggle” between the nut and the ball. This is particularly desirable in applications with rapidly changing loads. When this is not possible, the ball screw will experience significant backlash.
A ball screw nut can be either single or multiple circuits. Single or multiple-circuit ball nuts can be configured with 1 or 2 independent closed paths. Multi-circuit ball nuts have 2 or more circuits, making them more suitable for heavier loads. Depending on the application, a ball screw nut can be used for small clearance assemblies and compact sizes. In some cases, end caps and deflectors may be used to feed the balls back to their original position.

China Professional for Honda Civic Car Spare Part Front Axle Wheel Hub Bearing Vkba7469 43X78X44mm 44300-Sna-951   near me factory China Professional for Honda Civic Car Spare Part Front Axle Wheel Hub Bearing Vkba7469 43X78X44mm 44300-Sna-951   near me factory

China high quality 8e0501611 Rear Axle Wheel Hub Bearing Unit for Audi Skoda Superb I VW Passat with Best Sales

Product Description

Products Description

Car fitment:

  • AUDI
    • A6 (4B2, C5)  [1997-2005]
    • A6 Avant (4B5, C5)  [1997-2005]
    • A6 1998-2004 FWD
  • SKODA
    • SUPERB I (3U4)  [2001-2008]
  • VOLKSWAGEN
    • PASSAT (3B2)  [1996-2001]
    • PASSAT (3B3)  [2000-2005]
    • PASSAT Variant (3B5)  [1997-2001]
    • PASSAT Variant (3B6)  [2000-2005]
    • Passat 1998-2002
    • Passat 2003-2005 FWD
  • VW (SVW)
    • PASSAT Saloon (B5)  [2000-2009]

Specification:
Rear Axle
Flange Diameter: 5.2 In.
Bolt Circle Diameter: 4.4 In.
Wheel Pilot Diameter: 2.2 In.
Brake Pilot Diameter: 2.7 In.
Flange Offset: 2.8 In.
Hub Pilot Diameter: 1.5 In.
Hub Bolt Circle Diameter: 3.5 In.
Bolt Quantity: 5
Bolt Hole qty: 5
ABS Sensor: Yes
Number of Splines: N/A

Wheel Hub Bearing

A hub bearing, also known as a wheel hub bearing, enables the wheels and attached components to rotate smoothlyand keeps the wheel attached to the car. The bearings are mounted on a wheel hub, which is located between the brake drums and the axle. 
Wheel bearings wear out over time due to age and contamination. As they wear out, excess play also develops in the bearing. The main signs of a damaged wheel hub bearing are abnormal noises and loose steering.
Our hub bearing assemblies are made from high quality materials for durability, reliability, and high performance. 
high quality seal design offers premium protection from contamination and ensures a clean, long lasting hub bearing.
Our hub bearings are precision-machined and pre-coated with an anti-corrosion lubricant for enhanced protection and performance. They are manufactured to meet or exceed expectations for performance and fit.
In addition, they are designed for quick and easy installation. Please note: Hub Bearings should always be replaced in pairs (front or rear). 
In addition, hub bearings must be torqued to vehicle specifications to prevent failure.

Solver problem:

  • Frequently unberable
  • Car Jitter
  • Power reduction
  • Car noise

Features:

  • Good Ball: Precision and dimensions are more stable.
  • Good grease: allow the bearing to roll smoother.

  • Durable quality: excellent metal material, wear-resistant and durable.

    All products are all factory full inspection , like ABS detection,noise detection, cleareance detection for completed product, vibration detection, Angular clearance detection, Waterproof and dustproof detection and so on, making products more durable,more safe and life longer.

  • Reduce abnormal noise,Stable driving
  • High security
  • Longer service life and lower maintenance cost.
  • In-situ installation: Original specification,installation in 1 step. With accurately locate mounting holes.


Why choose us to be your cooperated supplier from China?
1. A wide range of Wheel Hub Bearingfor options.
2. Quality assurance: Advanced equipment, 100% finished product check, all of the products are inpsected carefully by QC before delivery. Product is Safe, Fixed,Stable,Durable.
3. Fast delivery, Prompt response,Professional staffs.
4. The customized components also can be manufactured
5. Neutral packing, export standard carton, or as your requirement.
6. Competive price: Order a HQ container, price will be more favorable.

Related Products
1. A wide range of Radiator Cooling Fan and other parts for options.
2. Quality assurance: Advanced equipment, 100% finished product check, all of the products are inpsected carefully by QC before delivery. Product is Safe, Fixed,Stable,Durable.
3. Fast delivery, Prompt response,Professional staffs.
4. The customized components also can be manufactured
5. Neutral packing, export standard carton, or as your requirement.
6. Competive price: Order a HQ container, price will be more favorable.

VW, AUDI, BENZ, BMW, PORSHCHE, LAND ROVER,Toyota, Nissan, Mitsubishi, Honda, Mazda , Hyundai Fordetc.
1. Clutch system
2. Cooling system
3. Electrical system
4. Transmission system
5. Steering system
6. Drive system
7. Suspension system
8.Braking syste

Company Introduction

FAQ
1. Is the product fit to your car model?
Please check if the parts are suitable for your model before purchase.
Or please tell us your Car Model and OE Number, and tell us the product name.

2. What you can supply to me?
We could supply all kinds of auto spare parts and accessories. Besides ,we provide OEM service, shipping service and QC service as well to make sure you get ONE-STOP purchase process from us.

3. Can you customize the products as per our request?
Yes, we do OEM and ODM. We could make the product suggestion based on your idea and budget.

4. How to get a sample from you?
All samples will be free if unit cost under 20USD,but the freight should be on your side. If you have express account like DHL,UPS etc we will send you directly, if you don’t have you can send express cost to our paypal account, any sample cost could be returned when you make order.

5. What’s your payment term?
We usually doing 30% deposit and 70% balance against copy of B/L by T/T, We also accept L/C ,D/P if total amount over $30000.

Welcome to your inqury now and built a long cooperatitive relationship with our professional service.

Windy Zhang

How to Determine the Quality of a Worm Shaft

There are many advantages of a worm shaft. It is easier to manufacture, as it does not require manual straightening. Among these benefits are ease of maintenance, reduced cost, and ease of installation. In addition, this type of shaft is much less prone to damage due to manual straightening. This article will discuss the different factors that determine the quality of a worm shaft. It also discusses the Dedendum, Root diameter, and Wear load capacity.
worm shaft

Root diameter

There are various options when choosing worm gearing. The selection depends on the transmission used and production possibilities. The basic profile parameters of worm gearing are described in the professional and firm literature and are used in geometry calculations. The selected variant is then transferred to the main calculation. However, you must take into account the strength parameters and the gear ratios for the calculation to be accurate. Here are some tips to choose the right worm gearing.
The root diameter of a worm gear is measured from the center of its pitch. Its pitch diameter is a standardized value that is determined from its pressure angle at the point of zero gearing correction. The worm gear pitch diameter is calculated by adding the worm’s dimension to the nominal center distance. When defining the worm gear pitch, you have to keep in mind that the root diameter of the worm shaft must be smaller than the pitch diameter.
Worm gearing requires teeth to evenly distribute the wear. For this, the tooth side of the worm must be convex in the normal and centre-line sections. The shape of the teeth, referred to as the evolvent profile, resembles a helical gear. Usually, the root diameter of a worm gear is more than a quarter inch. However, a half-inch difference is acceptable.
Another way to calculate the gearing efficiency of a worm shaft is by looking at the worm’s sacrificial wheel. A sacrificial wheel is softer than the worm, so most wear and tear will occur on the wheel. Oil analysis reports of worm gearing units almost always show a high copper and iron ratio, suggesting that the worm’s gearing is ineffective.

Dedendum

The dedendum of a worm shaft refers to the radial length of its tooth. The pitch diameter and the minor diameter determine the dedendum. In an imperial system, the pitch diameter is referred to as the diametral pitch. Other parameters include the face width and fillet radius. Face width describes the width of the gear wheel without hub projections. Fillet radius measures the radius on the tip of the cutter and forms a trochoidal curve.
The diameter of a hub is measured at its outer diameter, and its projection is the distance the hub extends beyond the gear face. There are 2 types of addendum teeth, 1 with short-addendum teeth and the other with long-addendum teeth. The gears themselves have a keyway (a groove machined into the shaft and bore). A key is fitted into the keyway, which fits into the shaft.
Worm gears transmit motion from 2 shafts that are not parallel, and have a line-toothed design. The pitch circle has 2 or more arcs, and the worm and sprocket are supported by anti-friction roller bearings. Worm gears have high friction and wear on the tooth teeth and restraining surfaces. If you’d like to know more about worm gears, take a look at the definitions below.
worm shaft

CZPT’s whirling process

Whirling process is a modern manufacturing method that is replacing thread milling and hobbing processes. It has been able to reduce manufacturing costs and lead times while producing precision gear worms. In addition, it has reduced the need for thread grinding and surface roughness. It also reduces thread rolling. Here’s more on how CZPT whirling process works.
The whirling process on the worm shaft can be used for producing a variety of screw types and worms. They can produce screw shafts with outer diameters of up to 2.5 inches. Unlike other whirling processes, the worm shaft is sacrificial, and the process does not require machining. A vortex tube is used to deliver chilled compressed air to the cutting point. If needed, oil is also added to the mix.
Another method for hardening a worm shaft is called induction hardening. The process is a high-frequency electrical process that induces eddy currents in metallic objects. The higher the frequency, the more surface heat it generates. With induction heating, you can program the heating process to harden only specific areas of the worm shaft. The length of the worm shaft is usually shortened.
Worm gears offer numerous advantages over standard gear sets. If used correctly, they are reliable and highly efficient. By following proper setup guidelines and lubrication guidelines, worm gears can deliver the same reliable service as any other type of gear set. The article by Ray Thibault, a mechanical engineer at the University of Virginia, is an excellent guide to lubrication on worm gears.

Wear load capacity

The wear load capacity of a worm shaft is a key parameter when determining the efficiency of a gearbox. Worms can be made with different gear ratios, and the design of the worm shaft should reflect this. To determine the wear load capacity of a worm, you can check its geometry. Worms are usually made with teeth ranging from 1 to 4 and up to twelve. Choosing the right number of teeth depends on several factors, including the optimisation requirements, such as efficiency, weight, and centre-line distance.
Worm gear tooth forces increase with increased power density, causing the worm shaft to deflect more. This reduces its wear load capacity, lowers efficiency, and increases NVH behavior. Advances in lubricants and bronze materials, combined with better manufacturing quality, have enabled the continuous increase in power density. Those 3 factors combined will determine the wear load capacity of your worm gear. It is critical to consider all 3 factors before choosing the right gear tooth profile.
The minimum number of gear teeth in a gear depends on the pressure angle at zero gearing correction. The worm diameter d1 is arbitrary and depends on a known module value, mx or mn. Worms and gears with different ratios can be interchanged. An involute helicoid ensures proper contact and shape, and provides higher accuracy and life. The involute helicoid worm is also a key component of a gear.
Worm gears are a form of ancient gear. A cylindrical worm engages with a toothed wheel to reduce rotational speed. Worm gears are also used as prime movers. If you’re looking for a gearbox, it may be a good option. If you’re considering a worm gear, be sure to check its load capacity and lubrication requirements.
worm shaft

NVH behavior

The NVH behavior of a worm shaft is determined using the finite element method. The simulation parameters are defined using the finite element method and experimental worm shafts are compared to the simulation results. The results show that a large deviation exists between the simulated and experimental values. In addition, the bending stiffness of the worm shaft is highly dependent on the geometry of the worm gear toothings. Hence, an adequate design for a worm gear toothing can help reduce the NVH (noise-vibration) behavior of the worm shaft.
To calculate the worm shaft’s NVH behavior, the main axes of moment of inertia are the diameter of the worm and the number of threads. This will influence the angle between the worm teeth and the effective distance of each tooth. The distance between the main axes of the worm shaft and the worm gear is the analytical equivalent bending diameter. The diameter of the worm gear is referred to as its effective diameter.
The increased power density of a worm gear results in increased forces acting on the corresponding worm gear tooth. This leads to a corresponding increase in deflection of the worm gear, which negatively affects its efficiency and wear load capacity. In addition, the increasing power density requires improved manufacturing quality. The continuous advancement in bronze materials and lubricants has also facilitated the continued increase in power density.
The toothing of the worm gears determines the worm shaft deflection. The bending stiffness of the worm gear toothing is also calculated by using a tooth-dependent bending stiffness. The deflection is then converted into a stiffness value by using the stiffness of the individual sections of the worm shaft. As shown in figure 5, a transverse section of a two-threaded worm is shown in the figure.

China high quality 8e0501611 Rear Axle Wheel Hub Bearing Unit for Audi Skoda Superb I VW Passat   with Best SalesChina high quality 8e0501611 Rear Axle Wheel Hub Bearing Unit for Audi Skoda Superb I VW Passat   with Best Sales

China Custom 050148b 1603195 90510544 90447280 328106 Auto Wheel Bearing Kit for Car with Good Quality with Free Design Custom

Product Description

Name: 050148B 165715 9571544 90447280 328106 Auto Wheel Bearing Kit for Car with Good Quality
  Wheel bearing kit
Position: wheel hub front/rear axle
Weight: 0.5 KG
Specifications: bearing size:35*72*33mm
Material: Chrome steel/GCR-15
Technology: Hot forging
CAGE: Metal/TN Nylon/steel
SEAL: Open/2RS/ZZ
Rolling body: Steel ball/roller
ABS: With
Quality: Top grade
Brands: DHXB, OEM
Origin: China


Introduction to WHEEL BEARING KITS
We supply wheel bearings to most OE car manufacturers in the world and has developed bearings for automotive applications to complete its range of kits.
· Product range of over 5.2 VKBA523 482A/472 VKBA 5038 35BWD16

ZheJiang Huaxu Bearing Co.,Ltd 
Our factory specialize wheel hub bearing, wheel bearing kit, clutch bearing, taper roller bearing, truck bearing, wheel hub bearing in high quality.
Our bearings have large loading capacity and long lifetime, and widely fit in different vehicles.
wheel bearings and kits to vehicles like LADA, TOYOTA, HONDA,, AUDI,Chevrolet, HYUNDAI,FIAT, FORD and so on.
Truck bearings applied to  , MAN, BENZ, DAF, SAF and so on.
And we can produce bearings which can meet your multifarious demands.
For example, wheel bearing, taper roller bearing, clutch release bearing, ball bearing, truck bearing ect. 
We can provide brands like, TIMKEN,  NSK, KOYO, NTN, NACHI, GMB, BW, GM, HYUNDAI ect.

Q:What’s your after-sales service and warranty?
A: We promise to bear the following responsibilities when defective products were found:
1.12 months warranty from the first day of receiving goods;
2. Replacements would be sent with goods of your next order;
3. Refund for defective products if customers require.

Q:Do you accept ODM&OEM orders?
A: Yes, we provide ODM&OEM services to worldwide customers, we also customize OEM box and packing as your requirements.

Q:What’s the MOQ?
A: MOQ is 10pcs for standardized products; for customized products, MOQ should be negotiated in advance. There is no MOQ for sample orders.

Q:How long is the lead time?
A: The lead time for sample orders is 3-5 days, for bulk orders is 5-15 days.

Q:Do you offer free samples? 
A: Yes we offer free samples to distributors and wholesalers, however customers should bear freight. We DO NOT offer free samples to end users. 

Q:How to place order?
A: 1. Email us the model, brand and quantity,shipping way of bearings and we will quote our best price for you; 
2. Proforma Invoice made and sent to you as the price agreed by both parts; 
3. Deposit Payment after confirming the PI and we arrange production; 
4. Balance paid before shipment or after copy of Bill of Loading.

Types of Screw Shafts

Screw shafts come in various types and sizes. These types include fully threaded, Lead, and Acme screws. Let’s explore these types in more detail. What type of screw shaft do you need? Which 1 is the best choice for your project? Here are some tips to choose the right screw:

Machined screw shaft

The screw shaft is a basic piece of machinery, but it can be further customized depending on the needs of the customer. Its features include high-precision threads and ridges. Machined screw shafts are generally manufactured using high-precision CNC machines or lathes. The types of screw shafts available vary in shape, size, and material. Different materials are suitable for different applications. This article will provide you with some examples of different types of screw shafts.
Ball screws are used for a variety of applications, including mounting machines, liquid crystal devices, measuring devices, and food and medical equipment. Various shapes are available, including miniature ball screws and nut brackets. They are also available without keyway. These components form a high-accuracy feed mechanism. Machined screw shafts are also available with various types of threaded ends for ease of assembly. The screw shaft is an integral part of linear motion systems.
When you need a machined screw shaft, you need to know the size of the threads. For smaller machine screws, you will need a mating part. For smaller screw sizes, the numbers will be denominated as industry Numeric Sizes. These denominations are not metric, but rather in mm, and they may not have a threads-per-inch designation. Similarly, larger machine screws will usually have threads that have a higher pitch than those with a lower pitch.
Another important feature of machine screws is that they have a thread on the entire shaft, unlike their normal counterparts. These machine screws have finer threads and are intended to be screwed into existing tapped holes using a nut. This means that these screws are generally stronger than other fasteners. They are usually used to hold together electronic components, industrial equipment, and engines. In addition to this, machine screws are usually made of a variety of materials.
screwshaft

Acme screw

An Acme screw is the most common type of threaded shaft available. It is available in a variety of materials including stainless steel and carbon steel. In many applications, it is used for large plates in crushing processes. ACME screws are self-locking and are ideal for applications requiring high clamping force and low friction. They also feature a variety of standard thread forms, including knurling and rolled worms.
Acme screws are available in a wide range of sizes, from 1/8″ to 6″. The diameter is measured from the outside of the screw to the bottom of the thread. The pitch is equal to the lead in a single start screw. The lead is equal to the pitch plus the number of starts. A screw of either type has a standard pitch and a lead. Acme screws are manufactured to be accurate and durable. They are also widely available in a wide range of materials and can be customized to fit your needs.
Another type of Acme screw is the ball screw. These have no back drive and are widely used in many applications. Aside from being lightweight, they are also able to move at faster speeds. A ball screw is similar to an Acme screw, but has a different shape. A ball screw is usually longer than an Acme screw. The ball screw is used for applications that require high linear speeds. An Acme screw is a common choice for many industries.
There are many factors that affect the speed and resolution of linear motion systems. For example, the nut position and the distance the screw travels can all affect the resolution. The total length of travel, the speed, and the duty cycle are all important. The lead size will affect the maximum linear speed and force output. If the screw is long, the greater the lead size, the higher the resolution. If the lead length is short, this may not be the most efficient option.
screwshaft

Lead screw

A lead screw is a threaded mechanical device. A lead screw consists of a cylindrical shaft, which includes a shallow thread portion and a tightly wound spring wire. This spring wire forms smooth, hard-spaced thread convolutions and provides wear-resistant engagement with the nut member. The wire’s leading and trailing ends are anchored to the shaft by means appropriate to the shaft’s composition. The screw is preferably made of stainless steel.
When selecting a lead screw, 1 should first determine its critical speed. The critical speed is the maximum rotations per minute based on the natural frequency of the screw. Excessive backlash will damage the lead screw. The maximum number of revolutions per minute depends on the screw’s minor diameter, length, assembly alignment, and end fixity. Ideally, the critical speed is 80% of its evaluated critical speed. A critical speed is not exceeded because excessive backlash would damage the lead screw and may be detrimental to the screw’s performance.
The PV curve defines the safe operating limits of a lead screw. This relationship describes the inverse relationship between contact surface pressure and sliding velocity. As the PV value increases, a lower rotation speed is required for heavier axial loads. Moreover, PV is affected by material and lubrication conditions. Besides, end fixity, which refers to the way the lead screw is supported, also affects its critical speed. Fixed-fixed and free end fixity are both possible.
Lead screws are widely used in industries and everyday appliances. In fact, they are used in robotics, lifting equipment, and industrial machinery. High-precision lead screws are widely used in the fields of engraving, fluid handling, data storage, and rapid prototyping. Moreover, they are also used in 3D printing and rapid prototyping. Lastly, lead screws are used in a wide range of applications, from measuring to assembly.

Fully threaded screw

A fully threaded screw shaft can be found in many applications. Threading is an important feature of screw systems and components. Screws with threaded shafts are often used to fix pieces of machinery together. Having fully threaded screw shafts ensures that screws can be installed without removing the nut or shaft. There are 2 major types of screw threads: coarse and fine. When it comes to coarse threads, UTS is the most common type, followed by BSP.
In the 1840s, a British engineer named Joseph Whitworth created a design that was widely used for screw threads. This design later became the British Standard Whitworth. This standard was used for screw threads in the United States during the 1840s and 1860s. But as screw threads evolved and international standards were established, this system remained largely unaltered. A new design proposed in 1864 by William Sellers improved upon Whitworth’s screw threads and simplified the pitch and surface finish.
Another reason for using fully threaded screws is their ability to reduce heat. When screw shafts are partially threaded, the bone grows up to the screw shaft and causes the cavity to be too narrow to remove it. Consequently, the screw is not capable of backing out. Therefore, fully threaded screws are the preferred choice for inter-fragmentary compression in children’s fractures. However, surgeons should know the potential complication when removing metalwork.
The full thread depth of a fully threaded screw is the distance at which a male thread can freely thread into the shaft. This dimension is typically 1 millimeter shy of the total depth of the drilled hole. This provides space for tap lead and chips. The full-thread depth also makes fully threaded screws ideal for axially-loaded connections. It is also suitable for retrofitting applications. For example, fully threaded screws are commonly used to connect 2 elements.
screwshaft

Ball screw

The basic static load rating of a ball screw is determined by the product of the maximum axial static load and the safety factor “s0”. This factor is determined by past experience in similar applications and should be selected according to the design requirements of the application. The basic static load rating is a good guideline for selecting a ball screw. There are several advantages to using a ball screw for a particular application. The following are some of the most common factors to consider when selecting a ball screw.
The critical speed limit of a ball screw is dependent on several factors. First of all, the critical speed depends on the mass, length and diameter of the shaft. Second, the deflection of the shaft and the type of end bearings determine the critical speed. Finally, the unsupported length is determined by the distance between the ball nut and end screw, which is also the distance between bearings. Generally, a ball screw with a diameter greater than 1.2 mm has a critical speed limit of 200 rpm.
The first step in manufacturing a high-quality ball screw is the choice of the right steel. While the steel used for manufacturing a ball screw has many advantages, its inherent quality is often compromised by microscopic inclusions. These microscopic inclusions may eventually lead to crack propagation, surface fatigue, and other problems. Fortunately, the technology used in steel production has advanced, making it possible to reduce the inclusion size to a minimum. However, higher-quality steels can be expensive. The best material for a ball screw is vacuum-degassed pure alloy steel.
The lead of a ball screw shaft is also an important factor to consider. The lead is the linear distance between the ball and the screw shaft. The lead can increase the amount of space between the balls and the screws. In turn, the lead increases the speed of a screw. If the lead of a ball screw is increased, it may increase its accuracy. If not, the lead of a ball screw can be improved through preloading, lubrication, and better mounting accuracy.

China Custom 050148b 1603195 90510544 90447280 328106 Auto Wheel Bearing Kit for Car with Good Quality   with Free Design CustomChina Custom 050148b 1603195 90510544 90447280 328106 Auto Wheel Bearing Kit for Car with Good Quality   with Free Design Custom