Product Description
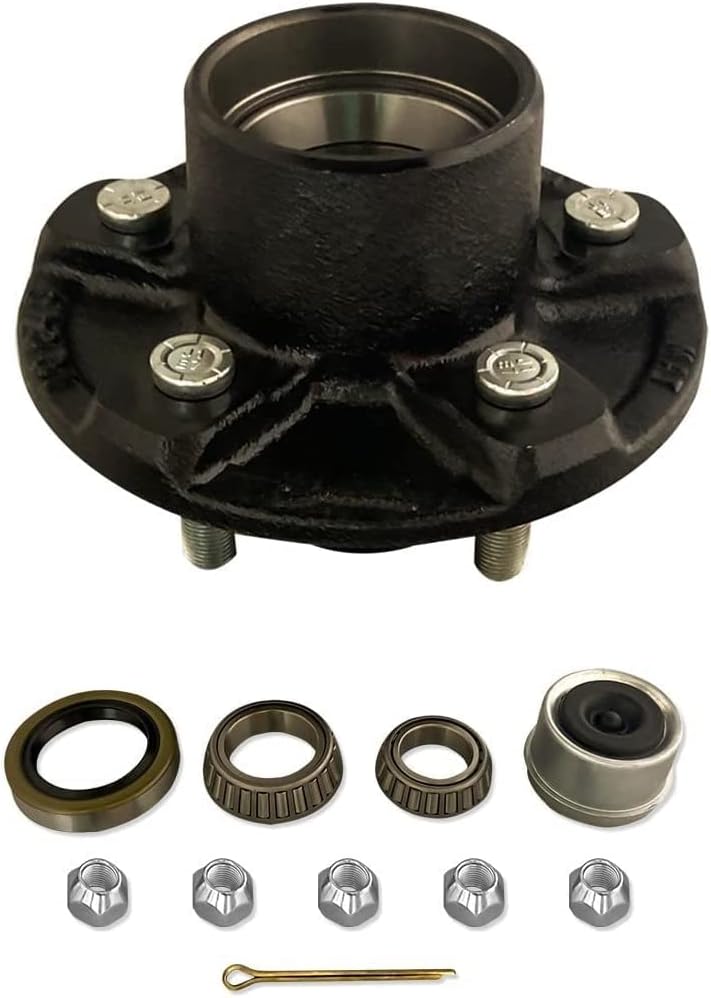
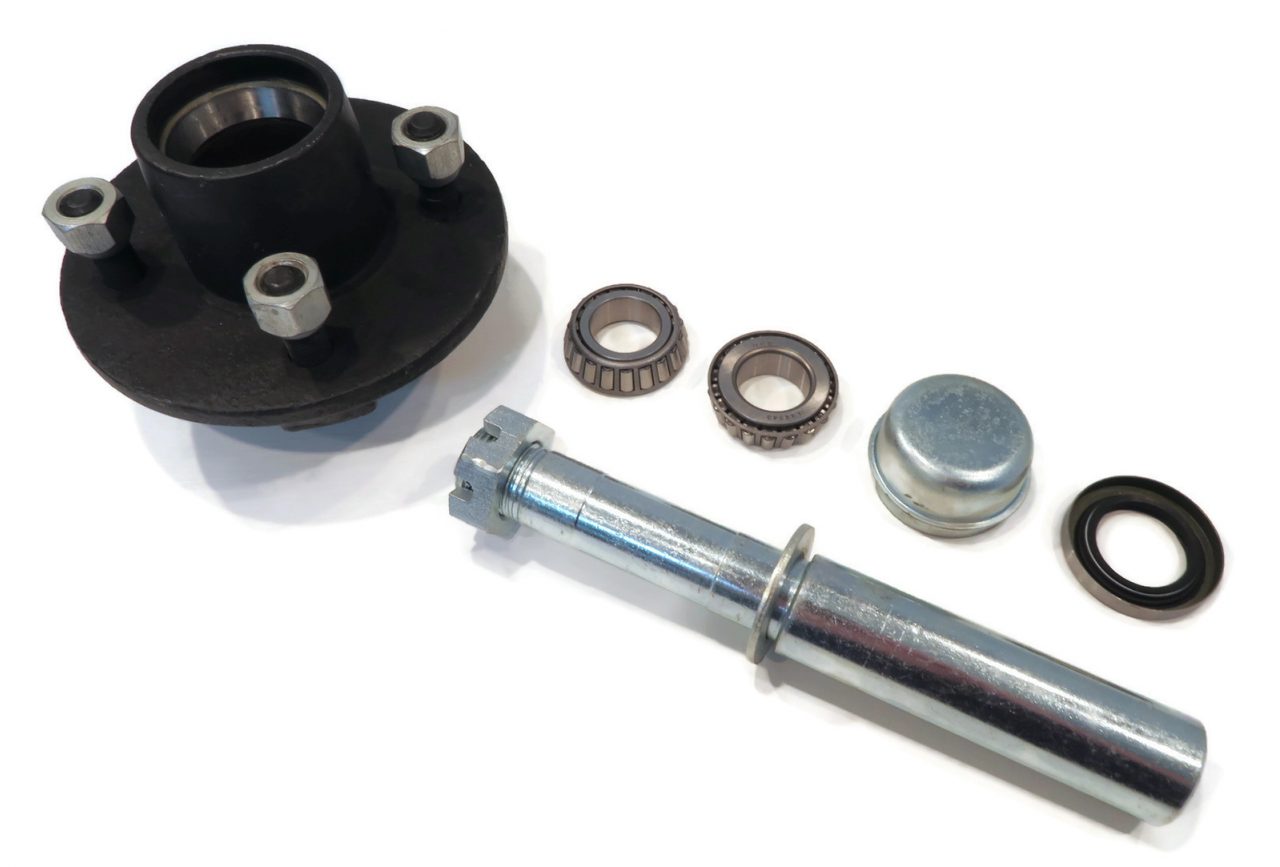
OEM Front Side Automobile Axle Bearing Wheel Bearing Wheel Hub
Product Description
|
|
|||||||||||||||||||||||||||||||||||||||||||||||||||||||||||||||||||||||||||||||||||||||||||||||||
Specifications
1.Supply to USA, Europe, and Australia
2.Material:40Cr/ 4130 Heat Treated Chromoly Steel/ 4340 Heat Treated Chromoly Steel/ 300M
3.Surface: Sand Blast/ Silver Zinc/ Yellow Zinc/ Black Zinc/ Chrome Finish/ Electrophoresis
We could manufacture all kinds of wheel hub assembly according to OEM No., Your Samples, or Drawings.
Bearings are usually installed to carry equipment on the shaft. The hardness and adhesion of the material itself buffer the impact of the bearing on the shaft head and reduce the appearance of the shaft head and hub wear.
Surface Treatment:
High quality stainless steel metal with high gloss and corrosion resistance. We guarantee the density of the liquid metal and the strength of the solidified metal.
Material Selection:
Ensure the strength of metal solidification, thick hub, hub uniform, not easy to break, more durable.
1) Don’t do the best, just do better
2) Quality:Using high-quality raw materials and innovative technology can make your product quality better and more Stable.And enhance market competitiveness
3) Quick Q&A that might save some of your concerns. Sincerity: We are committed to providing high quality products and services.There is no fake and no cheat Experience: We always focus on Technology and Quality,So we got rich professional experiences and had an excellent technical team. Services: We can offer fast pruducting and fast delivery and customized products,With a good after-sales services Win-Win: With a large number of satisfied customers in China.We are looking forward to meet you from all over the world Mission: To deliver high quality and reasonable products to customers all around the world.
Q1:Are you a manufacturer or a trading company?
We are both a factory and a trading company. This type can meet our customers’ requirements for flexible export. We are manufacturers, and our quality and price will be competitive in the market. In addition, we also have professional sales teams and engineers to provide you with the greatest support.
Q2:Why should we buy from your company instead of other suppliers?
We maintain good quality and competitive prices to ensure that our customers benefit. All our products are 100% tested before shipment. We take the initiative to provide you with better, more efficient, and more reliable solutions
Q3:Do you provide OEM/ODM services?
We have an experienced R&D team, advanced equipment, and a quality control laboratory factory. Of course, we can provide OEM/ODM services.
Q4:How to customize (OEM/ODM)?
If you have new product drawings or samples, please send them to us, and we can customize the hardware according to your requirements. We will also provide our professional suggestions on products to make the design more realized and maximize performance.
Quality First, Price Best, Service Foremost!
/* March 10, 2571 17:59:20 */!function(){function s(e,r){var a,o={};try{e&&e.split(“,”).forEach(function(e,t){e&&(a=e.match(/(.*?):(.*)$/))&&1
| After-sales Service: | as Specification |
|---|---|
| Warranty: | as Specification |
| Material: | Steel |
| Samples: |
US$ 5/Piece
1 Piece(Min.Order) | Order Sample |
|---|
| Customization: |
Available
| Customized Request |
|---|
.shipping-cost-tm .tm-status-off{background: none;padding:0;color: #1470cc}
|
Shipping Cost:
Estimated freight per unit. |
about shipping cost and estimated delivery time. |
|---|
| Payment Method: |
|
|---|---|
|
Initial Payment Full Payment |
| Currency: | US$ |
|---|
| Return&refunds: | You can apply for a refund up to 30 days after receipt of the products. |
|---|
What are the common symptoms of a failing axle hub, and how can they be identified?
Identifying the common symptoms of a failing axle hub is crucial for timely diagnosis and repair. Here’s a detailed explanation of the common symptoms and how they can be identified:
1. Wheel Vibrations:
One of the common symptoms of a failing axle hub is noticeable wheel vibrations. As the hub becomes worn or damaged, it may cause the wheel to wobble or shake while driving. These vibrations can be felt through the steering wheel, floorboard, or seat. To identify this symptom, pay attention to any unusual vibrations that occur, especially at higher speeds.
2. Grinding or Growling Noises:
A failing axle hub can produce grinding or growling noises. This can be an indication of worn-out or damaged wheel bearings within the hub. The noise may vary in intensity, and it is often more pronounced during turns or when the vehicle is in motion. To identify this symptom, listen for any unusual grinding or growling sounds coming from the wheels while driving.
3. Wheel Play or Looseness:
A failing axle hub can result in wheel play or looseness. When the hub is damaged or worn, it may not provide a secure mounting point for the wheel. As a result, the wheel may have excessive play or feel loose when you attempt to wiggle it by hand. To identify this symptom, jack up the vehicle and try to move the wheel in different directions to check for any abnormal movement.
4. Uneven Tire Wear:
A failing axle hub can contribute to uneven tire wear. If the hub is damaged, it can affect the alignment and cause the tire to wear unevenly. Look for signs of abnormal tire wear, such as excessive wear on one side of the tire or feathering patterns. Uneven tire wear may also be accompanied by other symptoms, such as vibrations or pulling to one side while driving.
5. ABS Warning Light:
In some cases, a failing axle hub can trigger the ABS (Anti-lock Braking System) warning light on the vehicle’s dashboard. This can occur if there is a problem with the wheel speed sensor, which is often integrated into the hub assembly. The ABS warning light indicates a fault in the braking system and should be diagnosed using a diagnostic tool by a qualified technician.
6. Visual Inspection:
A visual inspection can also help identify signs of a failing axle hub. Look for any visible damage or wear on the hub, such as cracks, corrosion, or bent flanges. Additionally, check for any leaking grease around the hub or signs of excessive heat, which can indicate bearing failure.
7. Professional Diagnosis:
If you suspect a failing axle hub but are unsure, it is recommended to have the vehicle inspected by a qualified mechanic. They can perform a comprehensive examination of the wheel assembly, including the hub, bearings, and associated components. They may use specialized tools and equipment to measure wheel play, check for bearing wear, and assess the overall condition of the hub.
In summary, common symptoms of a failing axle hub include wheel vibrations, grinding or growling noises, wheel play or looseness, uneven tire wear, ABS warning light activation, and visible damage. It is essential to pay attention to these symptoms and seek professional diagnosis and repair to prevent further damage and ensure the safe operation of the vehicle.
How often should axle hubs be inspected and replaced as part of routine vehicle maintenance?
Regular inspection and maintenance of axle hubs are crucial for ensuring the safe and efficient operation of a vehicle. The frequency of inspection and replacement may vary depending on several factors, including the vehicle’s make and model, driving conditions, and manufacturer’s recommendations. Here are some guidelines to consider:
- Manufacturer’s recommendations: The first and most reliable source of information regarding the inspection and replacement intervals for axle hubs is the vehicle manufacturer’s recommendations. These can usually be found in the owner’s manual or the manufacturer’s maintenance schedule. It is essential to follow these guidelines as they are specific to your particular vehicle.
- Driving conditions: If your vehicle is subjected to severe driving conditions, such as frequent towing, off-road use, or driving in extreme temperatures, the axle hubs may experience increased stress and wear. In such cases, more frequent inspections and maintenance may be necessary.
- Visual inspection: It is a good practice to visually inspect the axle hubs during routine maintenance or when performing other maintenance tasks, such as changing the brakes or rotating the tires. Look for any signs of damage, such as leaks, excessive play, or worn-out components. If any abnormalities are detected, further inspection or replacement may be required.
- Wheel bearing maintenance: The axle hubs house the wheel bearings, which are critical for the smooth rotation of the wheels. Some vehicles have serviceable wheel bearings that require periodic maintenance, such as cleaning and repacking with fresh grease. If your vehicle has serviceable wheel bearings, refer to the manufacturer’s recommendations for the appropriate maintenance intervals.
- Unusual noises or vibrations: If you notice any unusual noises, such as grinding, humming, or clicking sounds coming from the wheels, or if you experience vibrations while driving, it could be an indication of a problem with the axle hubs. In such cases, immediate inspection and necessary repairs or replacement should be performed.
It’s important to note that the intervals for inspecting and replacing axle hubs can vary significantly between different vehicles. Therefore, it is recommended to consult the vehicle manufacturer’s recommendations to determine the specific maintenance schedule for your vehicle. Additionally, if you are unsure or suspect any issues with the axle hubs, it is advisable to have a qualified mechanic or automotive technician inspect and assess the condition of the axle hubs.
In summary, the frequency of inspecting and replacing axle hubs as part of routine vehicle maintenance depends on factors such as the manufacturer’s recommendations, driving conditions, visual inspections, wheel bearing maintenance requirements, and the presence of any unusual noises or vibrations. Following the manufacturer’s guidelines and promptly addressing any abnormalities will help ensure the proper functioning and longevity of the axle hubs.

What are the torque specifications for securing an axle hub to the vehicle?
The torque specifications for securing an axle hub to the vehicle may vary depending on the specific make, model, and year of the vehicle. It is crucial to consult the manufacturer’s service manual or appropriate technical resources for the accurate torque specifications for your particular vehicle. Here’s a detailed explanation:
- Manufacturer’s Service Manual: The manufacturer’s service manual is the most reliable and authoritative source for torque specifications. It provides detailed information specific to your vehicle, including the recommended torque values for various components, such as the axle hub. The service manual may specify different torque values for different vehicle models or configurations. You can usually obtain the manufacturer’s service manual from the vehicle manufacturer’s official website or through authorized dealerships.
- Technical Resources: In addition to the manufacturer’s service manual, there are other technical resources available that provide torque specifications. These resources may include specialized automotive repair guides, online databases, or torque specification charts. Reputable automotive websites, professional repair manuals, or automotive forums dedicated to your vehicle’s make or model can be valuable sources for finding accurate torque specifications.
- Online Databases: Some websites offer online databases or torque specification tools that allow you to search for specific torque values based on your vehicle’s make, model, and year. These databases compile torque specifications from various sources and provide a convenient way to access the required information. However, it’s important to verify the accuracy and reliability of the source before relying on the provided torque values.
- Manufacturer Recommendations: In certain cases, the manufacturer may provide torque specifications on the packaging or documentation that accompanies the replacement axle hub. If you are using an OEM (Original Equipment Manufacturer) or aftermarket axle hub, it is advisable to check any provided documentation for torque recommendations specific to that particular product.
Regardless of the source you use to obtain torque specifications, it is essential to follow the recommended values precisely. Torque specifications are specified to ensure proper tightening and secure attachment of the axle hub to the vehicle. Over-tightening or under-tightening can lead to issues such as damage to components, improper seating, or premature wear. It is recommended to use a reliable torque wrench to achieve the specified torque values accurately.
In summary, the torque specifications for securing an axle hub to the vehicle depend on the specific make, model, and year of the vehicle. The manufacturer’s service manual, technical resources, online databases, and manufacturer recommendations are valuable sources to obtain accurate torque specifications. It is crucial to follow the recommended torque values precisely to ensure proper installation and avoid potential issues.


editor by CX 2023-12-21
China wholesaler CNC Steel Automobile Hub Bearing Unit Axle with high quality
Product Description
CNC Steel Automobile Hub Bearing Unit
Material:; Carbon Steel
Process:; Forging
Surface:; Self color/ zinc plated/ electric galvanized/ hot dip galvanized
Packing:; Carton,; Iron Pallet
ISO 9.;
Warmly welcome to our factory for a visit!
Should you have any queries,; please feel no hesitation in contacting us!
How to Select a Worm Shaft and Gear For Your Project
You will learn about axial pitch PX and tooth parameters for a Worm Shaft 20 and Gear 22. Detailed information on these 2 components will help you select a suitable Worm Shaft. Read on to learn more….and get your hands on the most advanced gearbox ever created! Here are some tips for selecting a Worm Shaft and Gear for your project!…and a few things to keep in mind.
Gear 22
The tooth profile of Gear 22 on Worm Shaft 20 differs from that of a conventional gear. This is because the teeth of Gear 22 are concave, allowing for better interaction with the threads of the worm shaft 20. The worm’s lead angle causes the worm to self-lock, preventing reverse motion. However, this self-locking mechanism is not entirely dependable. Worm gears are used in numerous industrial applications, from elevators to fishing reels and automotive power steering.
The new gear is installed on a shaft that is secured in an oil seal. To install a new gear, you first need to remove the old gear. Next, you need to unscrew the 2 bolts that hold the gear onto the shaft. Next, you should remove the bearing carrier from the output shaft. Once the worm gear is removed, you need to unscrew the retaining ring. After that, install the bearing cones and the shaft spacer. Make sure that the shaft is tightened properly, but do not over-tighten the plug.
To prevent premature failures, use the right lubricant for the type of worm gear. A high viscosity oil is required for the sliding action of worm gears. In two-thirds of applications, lubricants were insufficient. If the worm is lightly loaded, a low-viscosity oil may be sufficient. Otherwise, a high-viscosity oil is necessary to keep the worm gears in good condition.
Another option is to vary the number of teeth around the gear 22 to reduce the output shaft’s speed. This can be done by setting a specific ratio (for example, 5 or 10 times the motor’s speed) and modifying the worm’s dedendum accordingly. This process will reduce the output shaft’s speed to the desired level. The worm’s dedendum should be adapted to the desired axial pitch.
Worm Shaft 20
When selecting a worm gear, consider the following things to consider. These are high-performance, low-noise gears. They are durable, low-temperature, and long-lasting. Worm gears are widely used in numerous industries and have numerous benefits. Listed below are just some of their benefits. Read on for more information. Worm gears can be difficult to maintain, but with proper maintenance, they can be very reliable.
The worm shaft is configured to be supported in a frame 24. The size of the frame 24 is determined by the center distance between the worm shaft 20 and the output shaft 16. The worm shaft and gear 22 may not come in contact or interfere with 1 another if they are not configured properly. For these reasons, proper assembly is essential. However, if the worm shaft 20 is not properly installed, the assembly will not function.
Another important consideration is the worm material. Some worm gears have brass wheels, which may cause corrosion in the worm. In addition, sulfur-phosphorous EP gear oil activates on the brass wheel. These materials can cause significant loss of load surface. Worm gears should be installed with high-quality lubricant to prevent these problems. There is also a need to choose a material that is high-viscosity and has low friction.
Speed reducers can include many different worm shafts, and each speed reducer will require different ratios. In this case, the speed reducer manufacturer can provide different worm shafts with different thread patterns. The different thread patterns will correspond to different gear ratios. Regardless of the gear ratio, each worm shaft is manufactured from a blank with the desired thread. It will not be difficult to find 1 that fits your needs.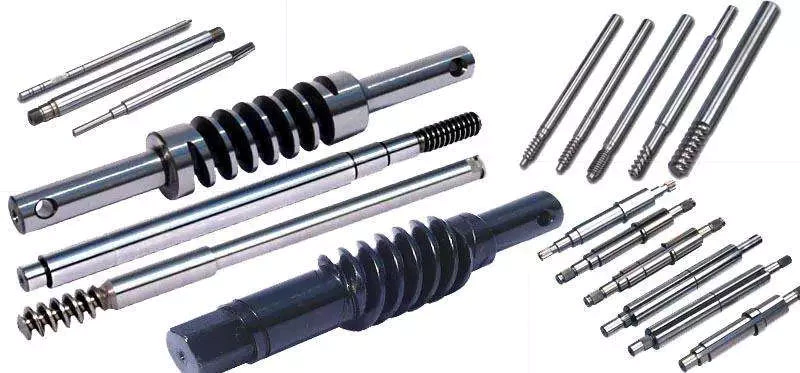
Gear 22’s axial pitch PX
The axial pitch of a worm gear is calculated by using the nominal center distance and the Addendum Factor, a constant. The Center Distance is the distance from the center of the gear to the worm wheel. The worm wheel pitch is also called the worm pitch. Both the dimension and the pitch diameter are taken into consideration when calculating the axial pitch PX for a Gear 22.
The axial pitch, or lead angle, of a worm gear determines how effective it is. The higher the lead angle, the less efficient the gear. Lead angles are directly related to the worm gear’s load capacity. In particular, the angle of the lead is proportional to the length of the stress area on the worm wheel teeth. A worm gear’s load capacity is directly proportional to the amount of root bending stress introduced by cantilever action. A worm with a lead angle of g is almost identical to a helical gear with a helix angle of 90 deg.
In the present invention, an improved method of manufacturing worm shafts is described. The method entails determining the desired axial pitch PX for each reduction ratio and frame size. The axial pitch is established by a method of manufacturing a worm shaft that has a thread that corresponds to the desired gear ratio. A gear is a rotating assembly of parts that are made up of teeth and a worm.
In addition to the axial pitch, a worm gear’s shaft can also be made from different materials. The material used for the gear’s worms is an important consideration in its selection. Worm gears are usually made of steel, which is stronger and corrosion-resistant than other materials. They also require lubrication and may have ground teeth to reduce friction. In addition, worm gears are often quieter than other gears.
Gear 22’s tooth parameters
A study of Gear 22’s tooth parameters revealed that the worm shaft’s deflection depends on various factors. The parameters of the worm gear were varied to account for the worm gear size, pressure angle, and size factor. In addition, the number of worm threads was changed. These parameters are varied based on the ISO/TS 14521 reference gear. This study validates the developed numerical calculation model using experimental results from Lutz and FEM calculations of worm gear shafts.
Using the results from the Lutz test, we can obtain the deflection of the worm shaft using the calculation method of ISO/TS 14521 and DIN 3996. The calculation of the bending diameter of a worm shaft according to the formulas given in AGMA 6022 and DIN 3996 show a good correlation with test results. However, the calculation of the worm shaft using the root diameter of the worm uses a different parameter to calculate the equivalent bending diameter.
The bending stiffness of a worm shaft is calculated through a finite element model (FEM). Using a FEM simulation, the deflection of a worm shaft can be calculated from its toothing parameters. The deflection can be considered for a complete gearbox system as stiffness of the worm toothing is considered. And finally, based on this study, a correction factor is developed.
For an ideal worm gear, the number of thread starts is proportional to the size of the worm. The worm’s diameter and toothing factor are calculated from Equation 9, which is a formula for the worm gear’s root inertia. The distance between the main axes and the worm shaft is determined by Equation 14.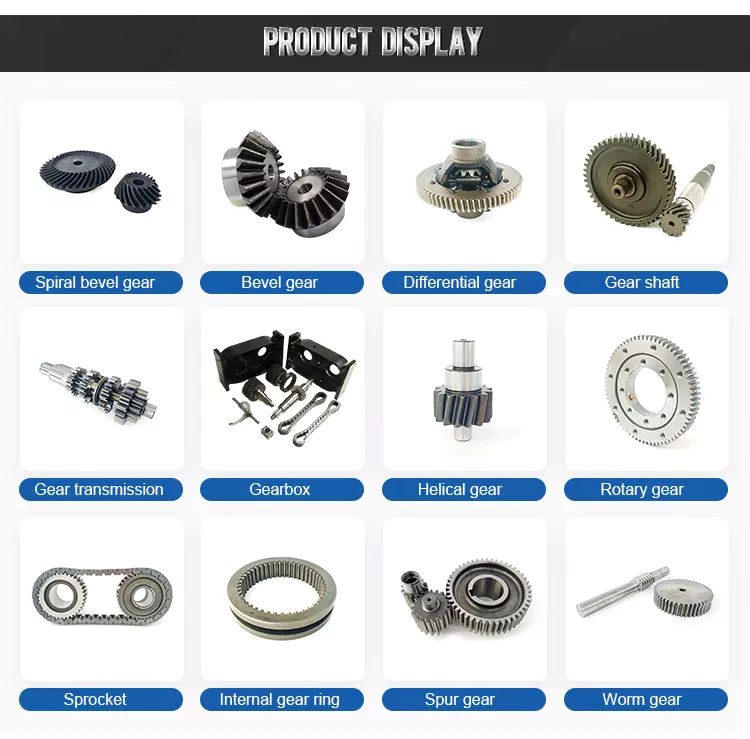
Gear 22’s deflection
To study the effect of toothing parameters on the deflection of a worm shaft, we used a finite element method. The parameters considered are tooth height, pressure angle, size factor, and number of worm threads. Each of these parameters has a different influence on worm shaft bending. Table 1 shows the parameter variations for a reference gear (Gear 22) and a different toothing model. The worm gear size and number of threads determine the deflection of the worm shaft.
The calculation method of ISO/TS 14521 is based on the boundary conditions of the Lutz test setup. This method calculates the deflection of the worm shaft using the finite element method. The experimentally measured shafts were compared to the simulation results. The test results and the correction factor were compared to verify that the calculated deflection is comparable to the measured deflection.
The FEM analysis indicates the effect of tooth parameters on worm shaft bending. Gear 22’s deflection on Worm Shaft can be explained by the ratio of tooth force to mass. The ratio of worm tooth force to mass determines the torque. The ratio between the 2 parameters is the rotational speed. The ratio of worm gear tooth forces to worm shaft mass determines the deflection of worm gears. The deflection of a worm gear has an impact on worm shaft bending capacity, efficiency, and NVH. The continuous development of power density has been achieved through advancements in bronze materials, lubricants, and manufacturing quality.
The main axes of moment of inertia are indicated with the letters A-N. The three-dimensional graphs are identical for the seven-threaded and one-threaded worms. The diagrams also show the axial profiles of each gear. In addition, the main axes of moment of inertia are indicated by a white cross.


China Good quality Automobile Wheel Hub 30201 30202 30203 30204 Agricultural Machine Bearing Sticker Processing with Great quality
Product Description
Automobile hub bearing 45712-4X01A 11955-EE50B
| Bearing No. | Dimensions | Basic load ratings | Cone | Cup | Mass | |||||||
| (mm) | (kN) | (Kg) | ||||||||||
| ISO 355 | d | D | T | Cr | Cor | B | R | C | r | (Approx.) | ||
| 302 Series | 35713 | T2DB017 | 17 | 40 | 13.25 | 20.5 | 20.3 | 12 | 1 | 11 | 1 | 0.08 |
| 35714 | T2DB571 | 20 | 47 | 15.25 | 28.2 | 28.7 | 14 | 1 | 12 | 1 | 0.127 | |
| 35715 | T3CC571 | 25 | 52 | 16.25 | 31.5 | 34 | 15 | 1 | 13 | 1 | 0.154 | |
| 35716 | T3DB030 | 30 | 62 | 17.25 | 43.5 | 48 | 16 | 1 | 14 | 1 | 0.241 | |
| 35717 | T3DB035 | 35 | 72 | 18.25 | 55.5 | 61.5 | 17 | 1.5 | 15 | 1.5 | 0.344 | |
| 35718 | T3DB040 | 40 | 80 | 19.75 | 61 | 67 | 18 | 1.5 | 16 | 1.5 | 0.435 | |
| 35719 | T3DB045 | 45 | 85 | 20.75 | 67.5 | 78.5 | 19 | 1.5 | 16 | 1.5 | 0.495 | |
| 35710 | T3DB050 | 50 | 90 | 21.75 | 77 | 93 | 20 | 1.5 | 17 | 1.5 | 0.563 | |
| 35711 | T3DB055 | 55 | 100 | 22.75 | 93 | 111 | 21 | 2 | 18 | 1.5 | 0.74 | |
| 35712 | T3EB060 | 60 | 110 | 23.75 | 105 | 125 | 22 | 2 | 19 | 1.5 | 0.949 | |
| 35713 | T3EB065 | 65 | 120 | 24.75 | 123 | 148 | 23 | 2 | 20 | 1.5 | 1.18 | |
| 35714 | T3EB070 | 70 | 125 | 26.25 | 131 | 162 | 24 | 2 | 21 | 1.5 | 1.26 | |
| 35715 | T4DB075 | 75 | 130 | 27.25 | 139 | 175 | 25 | 2 | 22 | 1.5 | 1.41 | |
| 35716 | T3EB080 | 80 | 140 | 28.25 | 160 | 200 | 26 | 2.5 | 22 | 2 | 1.72 | |
| 35717 | T3EB085 | 85 | 150 | 30.5 | 183 | 232 | 28 | 2.5 | 24 | 2 | 2.14 | |
| 35718 | T3FB090 | 90 | 160 | 32.5 | 208 | 267 | 30 | 2.5 | 26 | 2 | 2.66 | |
| 35719 | T3FB095 | 95 | 170 | 34.5 | 226 | 290 | 32 | 3 | 27 | 2.5 | 3.07 | |
| 35710 | T3FB100 | 100 | 180 | 37 | 258 | 335 | 34 | 3 | 29 | 2.5 | 3.78 | |
| 303 Series | 30302 | T2FB015 | 15 | 42 | 14.25 | 23.2 | 20.8 | 13 | 1 | 11 | 1 | 0.098 |
| 30303 | T2FB017 | 17 | 47 | 15.25 | 28.9 | 26.3 | 14 | 1 | 12 | 1 | 0.134 | |
| 30304 | T2FB571 | 20 | 52 | 16.25 | 35.5 | 34 | 16 | 1.5 | 13 | 1.5 | 0.176 | |
| 30305 | T2FB571 | 25 | 62 | 18.25 | 48.5 | 47.5 | 17 | 1.5 | 15 | 1.5 | 0.272 | |
| 30306 | T2FB030 | 30 | 72 | 20.75 | 60 | 61 | 19 | 1.5 | 16 | 1.5 | 0.408 | |
| 30307 | T2FB035 | 35 | 80 | 22.75 | 75 | 77 | 21 | 2 | 18 | 1.5 | 0.54 | |
| 30308 | T2FB040 | 40 | 90 | 25.25 | 91.5 | 102 | 23 | 2 | 20 | 1.5 | 0.769 | |
| 30309 | T2FB045 | 45 | 100 | 27.25 | 111 | 126 | 25 | 2 | 22 | 1.5 | 1.01 | |
| 3571 | T2FB050 | 50 | 110 | 29.25 | 133 | 152 | 27 | 2.5 | 23 | 2 | 1.31 | |
| 3571 | T2FB055 | 55 | 120 | 31.5 | 155 | 179 | 29 | 2.5 | 25 | 2 | 1.66 | |
| 3571 | T2FB060 | 60 | 130 | 33.5 | 180 | 210 | 31 | 3 | 26 | 2.5 | 2.06 | |
| 3571 | T2GB065 | 65 | 140 | 36 | 203 | 238 | 33 | 3 | 28 | 2.5 | 2.55 | |
| 3571 | T2GB070 | 70 | 150 | 38 | 230 | 272 | 35 | 3 | 30 | 2.5 | 3.06 | |
| 3571 | T2GB075 | 75 | 160 | 40 | 255 | 305 | 37 | 3 | 31 | 2.5 | 3.57 | |
| 3 0571 | T2GB080 | 80 | 170 | 42.5 | 291 | 350 | 39 | 3 | 33 | 2.5 | 4.41 | |
| 3 0571 | T2GB085 | 85 | 180 | 44.5 | 305 | 365 | 41 | 4 | 34 | 3 | 5.2 | |
FAQ
1.Q:Are you a factory or trading company?
A:SEMRI Bearing is specialized in manufacturing and exporting bearings.
SEMRI Bearing have own factory and warehouse.
2.Q:Can I get some samples and do you offer the sample free?
A:Yes, sure, SEMRI Bearing are honored to offer you samples.Can you buy a ticket ?3.Q:What is the payment?
A: 30% T/T In Advance, 70% T/T Against Copy Of B/L
B: 100% L/C At Sight
4.Q:What is the MOQ for bearing?
A: SEMRI Bearing MOQ is 1 pc.
5.Q:What kind of service you can offer?
A:Technology support;Installation guidance;OEM
Front Axle
Screw Shaft Types and Uses
Various uses for the screw shaft are numerous. Its major diameter is the most significant characteristic, while other aspects include material and function are important. Let us explore these topics in more detail. There are many different types of screw shafts, which include bronze, brass, titanium, and stainless steel. Read on to learn about the most common types. Listed below are some of the most common uses for a screw shaft. These include: C-clamps, screw jacks, vises, and more.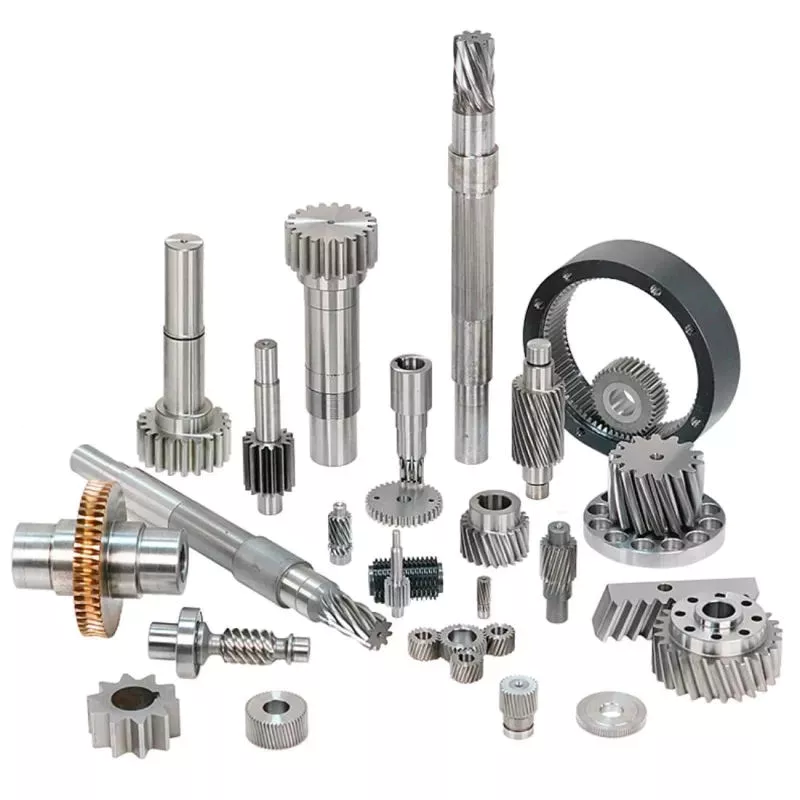
Major diameter of a screw shaft
A screw’s major diameter is measured in fractions of an inch. This measurement is commonly found on the screw label. A screw with a major diameter less than 1/4″ is labeled #0 to #14; those with a larger diameter are labeled fractions of an inch in a corresponding decimal scale. The length of a screw, also known as the shaft, is another measure used for the screw.
The major diameter of a screw shaft is the greater of its 2 outer diameters. When determining the major diameter of a screw, use a caliper, micrometer, or steel rule to make an accurate measurement. Generally, the first number in the thread designation refers to the major diameter. Therefore, if a screw has a thread of 1/2-10 Acme, the major diameter of the thread is.500 inches. The major diameter of the screw shaft will be smaller or larger than the original diameter, so it’s a good idea to measure the section of the screw that’s least used.
Another important measurement is the pitch. This measures the distance between 1 thread’s tip and the next thread’s corresponding point. Pitch is an important measurement because it refers to the distance a screw will advance in 1 turn. While lead and pitch are 2 separate concepts, they are often used interchangeably. As such, it’s important to know how to use them properly. This will make it easier to understand how to select the correct screw.
There are 3 different types of threads. The UTS and ISO metric threads are similar, but their common values for Dmaj and Pmaj are different. A screw’s major diameter is the largest diameter, while the minor diameter is the lowest. A nut’s major diameter, or the minor diameter, is also called the nut’s inside diameter. A bolt’s major diameter and minor diameter are measured with go/no-go gauges or by using an optical comparator.
The British Association and American Society of Mechanical Engineers standardized screw threads in the 1840s. A standard named “British Standard Whitworth” became a common standard for screw threads in the United States through the 1860s. In 1864, William Sellers proposed a new standard that simplified the Whitworth thread and had a 55 degree angle at the tip. Both standards were widely accepted. The major diameter of a screw shaft can vary from 1 manufacturer to another, so it’s important to know what size screw you’re looking for.
In addition to the thread angle, a screw’s major diameter determines the features it has and how it should be used. A screw’s point, or “thread”, is usually spiky and used to drill into an object. A flat tipped screw, on the other hand, is flat and requires a pre-drilled hole for installation. Finally, the diameter of a screw bolt is determined by the major and minor diameters.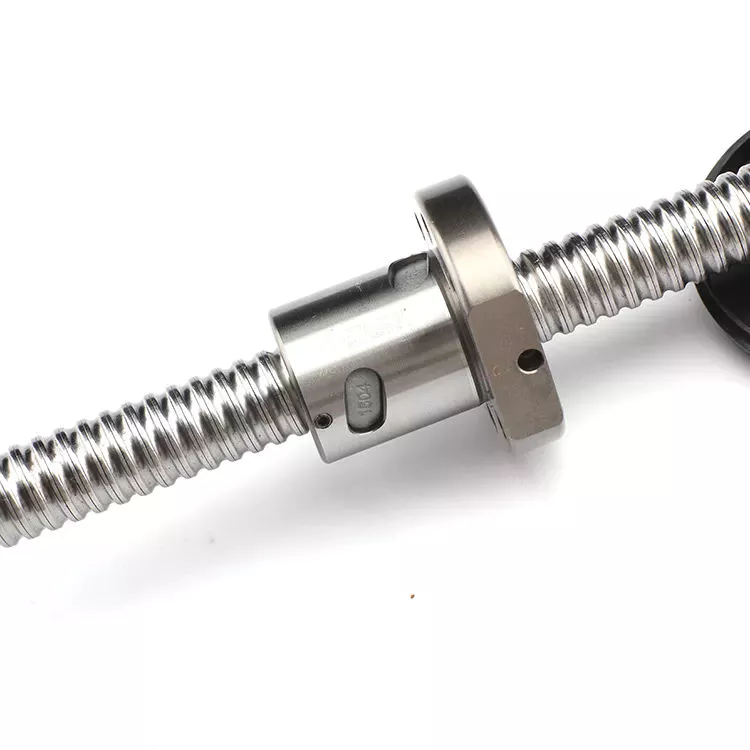
Material of a screw shaft
A screw shaft is a piece of machine equipment used to move raw materials. The screw shaft typically comprises a raw material w. For a particular screw to function correctly, the raw material must be sized properly. In general, screw shafts should have an axial-direction length L equal to the moving amount k per 1/2 rotation of the screw. The screw shaft must also have a proper contact angle ph1 in order to prevent raw material from penetrating the screw shaft.
The material used for the shaft depends on its application. A screw with a ball bearing will work better with a steel shaft than 1 made of aluminum. Aluminum screw shafts are the most commonly used for this application. Other materials include titanium. Some manufacturers also prefer stainless steel. However, if you want a screw with a more modern appearance, a titanium shaft is the way to go. In addition to that, screws with a chromium finish have better wear resistance.
The material of a screw shaft is important for a variety of applications. It needs to have high precision threads and ridges to perform its function. Manufacturers often use high-precision CNC machines and lathes to create screw shafts. Different screw shafts can have varying sizes and shapes, and each 1 will have different applications. Listed below are the different materials used for screw shafts. If you’re looking for a high-quality screw shaft, you should shop around.
A lead screw has an inverse relationship between contact surface pressure and sliding velocity. For heavier axial loads, a reduced rotation speed is needed. This curve will vary depending on the material used for the screw shaft and its lubrication conditions. Another important factor is end fixity. The material of a screw shaft can be either fixed or free, so make sure to consider this factor when choosing the material of your screw. The latter can also influence the critical speed and rigidity of the screw.
A screw shaft’s major diameter is the distance between the outer edge of the thread and the inner smooth part. Screw shafts are typically between 2 and 16 millimeters in diameter. They feature a cylindrical shape, a pointy tip, and a wider head and drive than the former. There are 2 basic types of screw heads: threaded and non-threaded. These have different properties and purposes.
Lead screws are a cost-effective alternative to ball screws, and are used for low power and light to medium-duty applications. They offer some advantages, but are not recommended for continuous power transmission. But lead screws are often quieter and smaller, which make them useful for many applications. Besides, they are often used in a kinematic pair with a nut object. They are also used to position objects.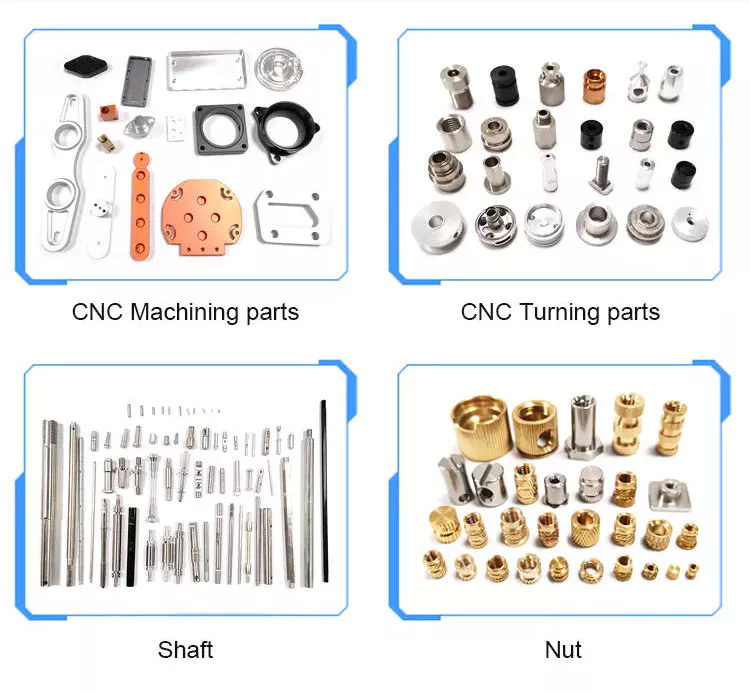
Function of a screw shaft
When choosing a screw for a linear motion system, there are many factors that should be considered, such as the position of the actuator and the screw and nut selection. Other considerations include the overall length of travel, the fastest move profile, the duty cycle, and the repeatability of the system. As a result, screw technology plays a critical role in the overall performance of a system. Here are the key factors to consider when choosing a screw.
Screws are designed with an external threading that digs out material from a surface or object. Not all screw shafts have complete threading, however. These are known as partially threaded screws. Fully threaded screws feature complete external threading on the shaft and a pointed tip. In addition to their use as fasteners, they can be used to secure and tighten many different types of objects and appliances.
Another factor to consider is axial force. The higher the force, the bigger the screw needs to be. Moreover, screws are similar to columns that are subject to both tension and compression loads. During the compression load, bowing or deflection is not desirable, so the integrity of the screw is important. So, consider the design considerations of your screw shaft and choose accordingly. You can also increase the torque by using different shaft sizes.
Shaft collars are also an important consideration. These are used to secure and position components on the shaft. They also act as stroke limiters and to retain sprocket hubs, bearings, and shaft protectors. They are available in several different styles. In addition to single and double split shaft collars, they can be threaded or set screw. To ensure that a screw collar will fit tightly to the shaft, the cap must not be overtightened.
Screws can be cylindrical or conical and vary in length and diameter. They feature a thread that mates with a complementary helix in the material being screwed into. A self-tapping screw will create a complementary helix during driving, creating a complementary helix that allows the screw to work with the material. A screw head is also an essential part of a screw, providing gripping power and compression to the screw.
A screw’s pitch and lead are also important parameters to consider. The pitch of the screw is the distance between the crests of the threads, which increases mechanical advantage. If the pitch is too small, vibrations will occur. If the pitch is too small, the screw may cause excessive wear and tear on the machine and void its intended purpose. The screw will be useless if it can’t be adjusted. And if it can’t fit a shaft with the required diameter, then it isn’t a good choice.
Despite being the most common type, there are various types of screws that differ in their functions. For example, a machine screw has a round head, while a truss head has a lower-profile dome. An oval-its point screw is a good choice for situations where the screw needs to be adjusted frequently. Another type is a soft nylon tip, which looks like a Half-dog point. It is used to grip textured or curved surfaces.


China high quality 30*60*37mm Long-Life Durable in Use CZPT Wheel Hub Bearing Dac30600037 Bah5000 Dac30600337 529891ab for Wheel Parts Automobile Parts with Good quality
Product Description
Wheel hub bearing can bear the weight and provide precise guidance for the rotation of the hub. It bears both axial load and radial load, and is a very important component. The hub bearing unit is developed on the basis of standard angular contact ball bearings and tapered roller bearings. It combines 2 sets of bearings as a whole. It has good assembly performance, can omit clearance adjustment, light weight, compact structure, and load capacity. Large, sealed bearings can be pre-loaded with grease, omit external wheel hub seals, and are free from maintenance. They have been widely used in cars, and there is a trend to gradually expand their applications in trucks.
A wide range of applications:
• agriculture and forestry equipment
• automotive and industrial gearboxes
• automotive and truck electric components, such as alternators
• electric motors
• fluid machinery
• material handling
• power tools and household appliances
• textile machinery
• two Wheeler.
Our Bearing Advantage:
1.Free Sample bearing
2.ISO Standard
3.Bearing Small order accepted
4.In Stock bearing
5.OEM bearing service
6.Professional:16 years manufacture bearing
7.Customized bearing, Customer’s bearing drawing or samples accepted
8.Competitive price bearing
9.TT Payment or Western Union or Trade Assurance Order
| Product Name | Wheel hub bearing DAC306AB |
| Brand Name | KOYO |
| Seals Type | OPEN |
| Material | Chrome Steel ,Stainless steel,Ceramic,Nylon |
| Clearance | C0,C2,C3,C4,C5 |
| Precision Grade | P0,P6,P5,P4,P2(ABEC1, ABEC3, ABEC5, ABEC7, ABEC9) |
| Greese | SRL ,PS2, Alvania R12 ,etc |
| Number of Row | Single Row |
| Certifications | ISO 9001 |
| Package | Box,Carton,Wooden Box,Plastic Tube or Per buyers requirement . |
| MOQ | 1PCS |
| Serice | OEM |
| Sample | Available |
| Payment Term | TT or Western Union |
| Port | HangZhou/HangZhou/ZheJiang |
PRODUCT DISPLAY
Q: Are you trading company or manufacturer ?
A: We are manufacturer.
Q:Do you provide samples ? is it free or extra ?
A:Yes, we could offer the sample but it is not free.
Q:What kind of shipment will you use?
A:Boat and FedEx,TNT,DHL,UPS,EMS etc.
Q:could you make bearings with our OEM logo,color and packing?
A: Of course. What you need to do is email us the brand logo and colors.
Q: How long is your delivery time?
A: Generally it is 3-7 days if the goods are in stock. or it is 15-30 days if the goods are not in stock, it is according to quantity.
Q: Will you check these products before shipment?
A: Yes, before shipment products will be strictly inspection on our factory QC Process System.We have a professional QC team.
Q: What’s the Payment Terms ?
A: Usually we accept T/T ,western union ,and order online.
If you want to know more details, please contact us.
Analytical Approaches to Estimating Contact Pressures in Spline Couplings
A spline coupling is a type of mechanical connection between 2 rotating shafts. It consists of 2 parts – a coupler and a coupling. Both parts have teeth which engage and transfer loads. However, spline couplings are typically over-dimensioned, which makes them susceptible to fatigue and static behavior. Wear phenomena can also cause the coupling to fail. For this reason, proper spline coupling design is essential for achieving optimum performance.
Modeling a spline coupling
Spline couplings are becoming increasingly popular in the aerospace industry, but they operate in a slightly misaligned state, causing both vibrations and damage to the contact surfaces. To solve this problem, this article offers analytical approaches for estimating the contact pressures in a spline coupling. Specifically, this article compares analytical approaches with pure numerical approaches to demonstrate the benefits of an analytical approach.
To model a spline coupling, first you create the knowledge base for the spline coupling. The knowledge base includes a large number of possible specification values, which are related to each other. If you modify 1 specification, it may lead to a warning for violating another. To make the design valid, you must create a spline coupling model that meets the specified specification values.
After you have modeled the geometry, you must enter the contact pressures of the 2 spline couplings. Then, you need to determine the position of the pitch circle of the spline. In Figure 2, the centre of the male coupling is superposed to that of the female spline. Then, you need to make sure that the alignment meshing distance of the 2 splines is the same.
Once you have the data you need to create a spline coupling model, you can begin by entering the specifications for the interface design. Once you have this data, you need to choose whether to optimize the internal spline or the external spline. You’ll also need to specify the tooth friction coefficient, which is used to determine the stresses in the spline coupling model 20. You should also enter the pilot clearance, which is the clearance between the tip 186 of a tooth 32 on 1 spline and the feature on the mating spline.
After you have entered the desired specifications for the external spline, you can enter the parameters for the internal spline. For example, you can enter the outer diameter limit 154 of the major snap 54 and the minor snap 56 of the internal spline. The values of these parameters are displayed in color-coded boxes on the Spline Inputs and Configuration GUI screen 80. Once the parameters are entered, you’ll be presented with a geometric representation of the spline coupling model 20.
Creating a spline coupling model 20
The spline coupling model 20 is created by a product model software program 10. The software validates the spline coupling model against a knowledge base of configuration-dependent specification constraints and relationships. This report is then input to the ANSYS stress analyzer program. It lists the spline coupling model 20’s geometric configurations and specification values for each feature. The spline coupling model 20 is automatically recreated every time the configuration or performance specifications of the spline coupling model 20 are modified.
The spline coupling model 20 can be configured using the product model software program 10. A user specifies the axial length of the spline stack, which may be zero, or a fixed length. The user also enters a radial mating face 148, if any, and selects a pilot clearance specification value of 14.5 degrees or 30 degrees.
A user can then use the mouse 110 to modify the spline coupling model 20. The spline coupling knowledge base contains a large number of possible specification values and the spline coupling design rule. If the user tries to change a spline coupling model, the model will show a warning about a violation of another specification. In some cases, the modification may invalidate the design.
In the spline coupling model 20, the user enters additional performance requirement specifications. The user chooses the locations where maximum torque is transferred for the internal and external splines 38 and 40. The maximum torque transfer location is determined by the attachment configuration of the hardware to the shafts. Once this is selected, the user can click “Next” to save the model. A preview of the spline coupling model 20 is displayed.
The model 20 is a representation of a spline coupling. The spline specifications are entered in the order and arrangement as specified on the spline coupling model 20 GUI screen. Once the spline coupling specifications are entered, the product model software program 10 will incorporate them into the spline coupling model 20. This is the last step in spline coupling model creation.
Analysing a spline coupling model 20
An analysis of a spline coupling model consists of inputting its configuration and performance specifications. These specifications may be generated from another computer program. The product model software program 10 then uses its internal knowledge base of configuration dependent specification relationships and constraints to create a valid three-dimensional parametric model 20. This model contains information describing the number and types of spline teeth 32, snaps 34, and shoulder 36.
When you are analysing a spline coupling, the software program 10 will include default values for various specifications. The spline coupling model 20 comprises an internal spline 38 and an external spline 40. Each of the splines includes its own set of parameters, such as its depth, width, length, and radii. The external spline 40 will also contain its own set of parameters, such as its orientation.
Upon selecting these parameters, the software program will perform various analyses on the spline coupling model 20. The software program 10 calculates the nominal and maximal tooth bearing stresses and fatigue life of a spline coupling. It will also determine the difference in torsional windup between an internal and an external spline. The output file from the analysis will be a report file containing model configuration and specification data. The output file may also be used by other computer programs for further analysis.
Once these parameters are set, the user enters the design criteria for the spline coupling model 20. In this step, the user specifies the locations of maximum torque transfer for both the external and internal spline 38. The maximum torque transfer location depends on the configuration of the hardware attached to the shafts. The user may enter up to 4 different performance requirement specifications for each spline.
The results of the analysis show that there are 2 phases of spline coupling. The first phase shows a large increase in stress and vibration. The second phase shows a decline in both stress and vibration levels. The third stage shows a constant meshing force between 300N and 320N. This behavior continues for a longer period of time, until the final stage engages with the surface.
Misalignment of a spline coupling
A study aimed to investigate the position of the resultant contact force in a spline coupling engaging teeth under a steady torque and rotating misalignment. The study used numerical methods based on Finite Element Method (FEM) models. It produced numerical results for nominal conditions and parallel offset misalignment. The study considered 2 levels of misalignment – 0.02 mm and 0.08 mm – with different loading levels.
The results showed that the misalignment between the splines and rotors causes a change in the meshing force of the spline-rotor coupling system. Its dynamics is governed by the meshing force of splines. The meshing force of a misaligned spline coupling is related to the rotor-spline coupling system parameters, the transmitting torque, and the dynamic vibration displacement.
Despite the lack of precise measurements, the misalignment of splines is a common problem. This problem is compounded by the fact that splines usually feature backlash. This backlash is the result of the misaligned spline. The authors analyzed several splines, varying pitch diameters, and length/diameter ratios.
A spline coupling is a two-dimensional mechanical system, which has positive backlash. The spline coupling is comprised of a hub and shaft, and has tip-to-root clearances that are larger than the backlash. A form-clearance is sufficient to prevent tip-to-root fillet contact. The torque on the splines is transmitted via friction.
When a spline coupling is misaligned, a torque-biased thrust force is generated. In such a situation, the force can exceed the torque, causing the component to lose its alignment. The two-way transmission of torque and thrust is modeled analytically in the present study. The analytical approach provides solutions that can be integrated into the design process. So, the next time you are faced with a misaligned spline coupling problem, make sure to use an analytical approach!
In this study, the spline coupling is analyzed under nominal conditions without a parallel offset misalignment. The stiffness values obtained are the percentage difference between the nominal pitch diameter and load application diameter. Moreover, the maximum percentage difference in the measured pitch diameter is 1.60% under a torque of 5000 N*m. The other parameter, the pitch angle, is taken into consideration in the calculation.


China manufacturer High Precision Long-Life Wheel Hub Bearing Dac35720033 548033 Bah0031 for Car Parts Automobile Parts CZPT CZPT CZPT CZPT with high quality
Product Description
Wheel hub bearing can bear the weight and provide precise guidance for the rotation of the hub. It bears both axial load and radial load, and is a very important component. The hub bearing unit is developed on the basis of standard angular contact ball bearings and tapered roller bearings. It combines 2 sets of bearings as a whole. It has good assembly performance, can omit clearance adjustment, light weight, compact structure, and load capacity. Large, sealed bearings can be pre-loaded with grease, omit external wheel hub seals, and are free from maintenance. They have been widely used in cars, and there is a trend to gradually expand their applications in trucks.
A wide range of applications:
• agriculture and forestry equipment
• automotive and industrial gearboxes
• automotive and truck electric components, such as alternators
• electric motors
• fluid machinery
• material handling
• power tools and household appliances
• textile machinery
• two Wheeler.
Our Bearing Advantage:
1.Free Sample bearing
2.ISO Standard
3.Bearing Small order accepted
4.In Stock bearing
5.OEM bearing service
6.Professional:16 years manufacture bearing
7.Customized bearing, Customer’s bearing drawing or samples accepted
8.Competitive price bearing
9.TT Payment or Western Union or Trade Assurance Order
| Product Name | Wheel hub bearing DAC3572 BAH0031 |
| Brand Name | KOYO |
| Seals Type | OPEN |
| Material | Chrome Steel ,Stainless steel,Ceramic,Nylon |
| Clearance | C0,C2,C3,C4,C5 |
| Precision Grade | P0,P6,P5,P4,P2(ABEC1, ABEC3, ABEC5, ABEC7, ABEC9) |
| Greese | SRL ,PS2, Alvania R12 ,etc |
| Number of Row | Single Row |
| Certifications | ISO 9001 |
| Package | Box,Carton,Wooden Box,Plastic Tube or Per buyers requirement . |
| MOQ | 1PCS |
| Serice | OEM |
| Sample | Available |
| Payment Term | TT or Western Union |
| Port | HangZhou/HangZhou/ZheJiang |
PRODUCT DISPLAY
1. What is your Before-sales Service ?
1.Offer bearing related consultation about technology and application;
2.Help customers about bearing choice, clearance configuration, products’ life and reliability analysis;
3.Offer highly cost-effective and complete solution program according to site conditions;
4.Offer localized program on introduced equipment to save running cost
5.Design and develop non-standard bearing to support customers’ technology innovation.
2. What is your After-sales Service ?
1.Offer training about bearing installation and maintenance;
2.Offer guidance about bearing installation, adjustment and testing at site;
3.Help customers with trouble diagnosis and failure analysis;
4.Visit customers regularly and feedback their rational suggestions and requirements to company.
If you want to know more details, please contact us.
Calculating the Deflection of a Worm Shaft
In this article, we’ll discuss how to calculate the deflection of a worm gear’s worm shaft. We’ll also discuss the characteristics of a worm gear, including its tooth forces. And we’ll cover the important characteristics of a worm gear. Read on to learn more! Here are some things to consider before purchasing a worm gear. We hope you enjoy learning! After reading this article, you’ll be well-equipped to choose a worm gear to match your needs.
Calculation of worm shaft deflection
The main goal of the calculations is to determine the deflection of a worm. Worms are used to turn gears and mechanical devices. This type of transmission uses a worm. The worm diameter and the number of teeth are inputted into the calculation gradually. Then, a table with proper solutions is shown on the screen. After completing the table, you can then move on to the main calculation. You can change the strength parameters as well.
The maximum worm shaft deflection is calculated using the finite element method (FEM). The model has many parameters, including the size of the elements and boundary conditions. The results from these simulations are compared to the corresponding analytical values to calculate the maximum deflection. The result is a table that displays the maximum worm shaft deflection. The tables can be downloaded below. You can also find more information about the different deflection formulas and their applications.
The calculation method used by DIN EN 10084 is based on the hardened cemented worm of 16MnCr5. Then, you can use DIN EN 10084 (CuSn12Ni2-C-GZ) and DIN EN 1982 (CuAl10Fe5Ne5-C-GZ). Then, you can enter the worm face width, either manually or using the auto-suggest option.
Common methods for the calculation of worm shaft deflection provide a good approximation of deflection but do not account for geometric modifications on the worm. While Norgauer’s 2021 approach addresses these issues, it fails to account for the helical winding of the worm teeth and overestimates the stiffening effect of gearing. More sophisticated approaches are required for the efficient design of thin worm shafts.
Worm gears have a low noise and vibration compared to other types of mechanical devices. However, worm gears are often limited by the amount of wear that occurs on the softer worm wheel. Worm shaft deflection is a significant influencing factor for noise and wear. The calculation method for worm gear deflection is available in ISO/TR 14521, DIN 3996, and AGMA 6022.
The worm gear can be designed with a precise transmission ratio. The calculation involves dividing the transmission ratio between more stages in a gearbox. Power transmission input parameters affect the gearing properties, as well as the material of the worm/gear. To achieve a better efficiency, the worm/gear material should match the conditions that are to be experienced. The worm gear can be a self-locking transmission.
The worm gearbox contains several machine elements. The main contributors to the total power loss are the axial loads and bearing losses on the worm shaft. Hence, different bearing configurations are studied. One type includes locating/non-locating bearing arrangements. The other is tapered roller bearings. The worm gear drives are considered when locating versus non-locating bearings. The analysis of worm gear drives is also an investigation of the X-arrangement and four-point contact bearings.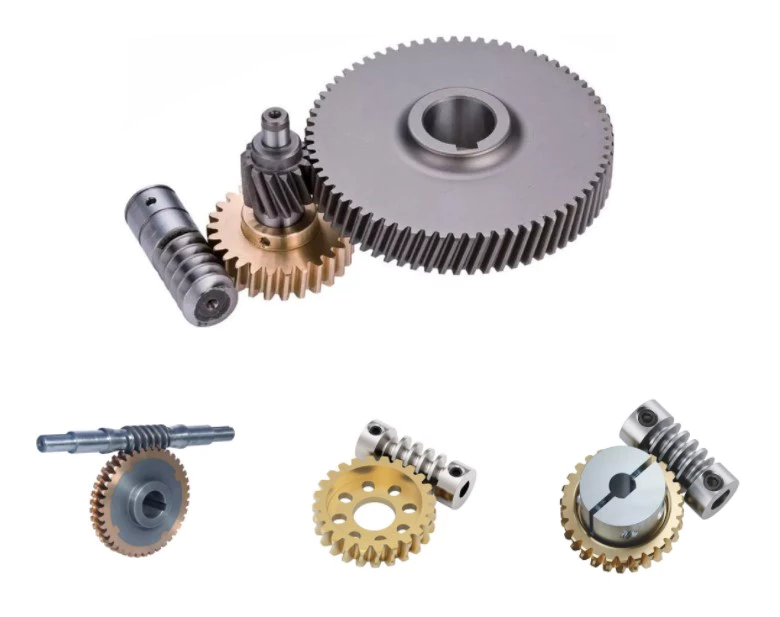
Influence of tooth forces on bending stiffness of a worm gear
The bending stiffness of a worm gear is dependent on tooth forces. Tooth forces increase as the power density increases, but this also leads to increased worm shaft deflection. The resulting deflection can affect efficiency, wear load capacity, and NVH behavior. Continuous improvements in bronze materials, lubricants, and manufacturing quality have enabled worm gear manufacturers to produce increasingly high power densities.
Standardized calculation methods take into account the supporting effect of the toothing on the worm shaft. However, overhung worm gears are not included in the calculation. In addition, the toothing area is not taken into account unless the shaft is designed next to the worm gear. Similarly, the root diameter is treated as the equivalent bending diameter, but this ignores the supporting effect of the worm toothing.
A generalized formula is provided to estimate the STE contribution to vibratory excitation. The results are applicable to any gear with a meshing pattern. It is recommended that engineers test different meshing methods to obtain more accurate results. One way to test tooth-meshing surfaces is to use a finite element stress and mesh subprogram. This software will measure tooth-bending stresses under dynamic loads.
The effect of tooth-brushing and lubricant on bending stiffness can be achieved by increasing the pressure angle of the worm pair. This can reduce tooth bending stresses in the worm gear. A further method is to add a load-loaded tooth-contact analysis (CCTA). This is also used to analyze mismatched ZC1 worm drive. The results obtained with the technique have been widely applied to various types of gearing.
In this study, we found that the ring gear’s bending stiffness is highly influenced by the teeth. The chamfered root of the ring gear is larger than the slot width. Thus, the ring gear’s bending stiffness varies with its tooth width, which increases with the ring wall thickness. Furthermore, a variation in the ring wall thickness of the worm gear causes a greater deviation from the design specification.
To understand the impact of the teeth on the bending stiffness of a worm gear, it is important to know the root shape. Involute teeth are susceptible to bending stress and can break under extreme conditions. A tooth-breakage analysis can control this by determining the root shape and the bending stiffness. The optimization of the root shape directly on the final gear minimizes the bending stress in the involute teeth.
The influence of tooth forces on the bending stiffness of a worm gear was investigated using the CZPT Spiral Bevel Gear Test Facility. In this study, multiple teeth of a spiral bevel pinion were instrumented with strain gages and tested at speeds ranging from static to 14400 RPM. The tests were performed with power levels as high as 540 kW. The results obtained were compared with the analysis of a three-dimensional finite element model.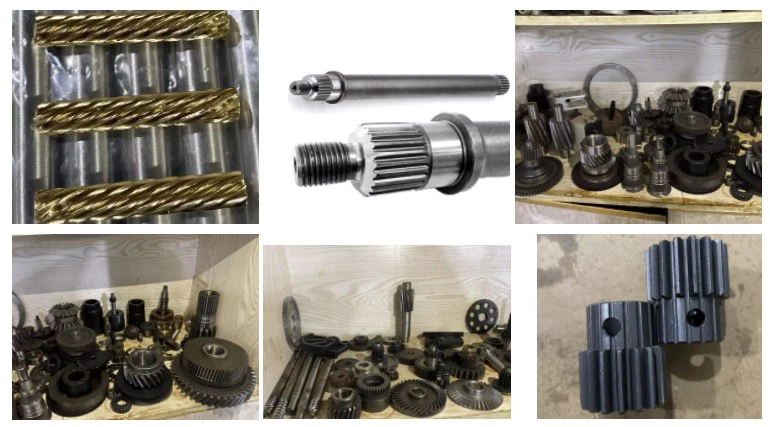
Characteristics of worm gears
Worm gears are unique types of gears. They feature a variety of characteristics and applications. This article will examine the characteristics and benefits of worm gears. Then, we’ll examine the common applications of worm gears. Let’s take a look! Before we dive in to worm gears, let’s review their capabilities. Hopefully, you’ll see how versatile these gears are.
A worm gear can achieve massive reduction ratios with little effort. By adding circumference to the wheel, the worm can greatly increase its torque and decrease its speed. Conventional gearsets require multiple reductions to achieve the same reduction ratio. Worm gears have fewer moving parts, so there are fewer places for failure. However, they can’t reverse the direction of power. This is because the friction between the worm and wheel makes it impossible to move the worm backwards.
Worm gears are widely used in elevators, hoists, and lifts. They are particularly useful in applications where stopping speed is critical. They can be incorporated with smaller brakes to ensure safety, but shouldn’t be relied upon as a primary braking system. Generally, they are self-locking, so they are a good choice for many applications. They also have many benefits, including increased efficiency and safety.
Worm gears are designed to achieve a specific reduction ratio. They are typically arranged between the input and output shafts of a motor and a load. The 2 shafts are often positioned at an angle that ensures proper alignment. Worm gear gears have a center spacing of a frame size. The center spacing of the gear and worm shaft determines the axial pitch. For instance, if the gearsets are set at a radial distance, a smaller outer diameter is necessary.
Worm gears’ sliding contact reduces efficiency. But it also ensures quiet operation. The sliding action limits the efficiency of worm gears to 30% to 50%. A few techniques are introduced herein to minimize friction and to produce good entrance and exit gaps. You’ll soon see why they’re such a versatile choice for your needs! So, if you’re considering purchasing a worm gear, make sure you read this article to learn more about its characteristics!
An embodiment of a worm gear is described in FIGS. 19 and 20. An alternate embodiment of the system uses a single motor and a single worm 153. The worm 153 turns a gear which drives an arm 152. The arm 152, in turn, moves the lens/mirr assembly 10 by varying the elevation angle. The motor control unit 114 then tracks the elevation angle of the lens/mirr assembly 10 in relation to the reference position.
The worm wheel and worm are both made of metal. However, the brass worm and wheel are made of brass, which is a yellow metal. Their lubricant selections are more flexible, but they’re limited by additive restrictions due to their yellow metal. Plastic on metal worm gears are generally found in light load applications. The lubricant used depends on the type of plastic, as many types of plastics react to hydrocarbons found in regular lubricant. For this reason, you need a non-reactive lubricant.

